Free Crochet Mini Cats Pattern 6 Adorable Amigurumi Kittens
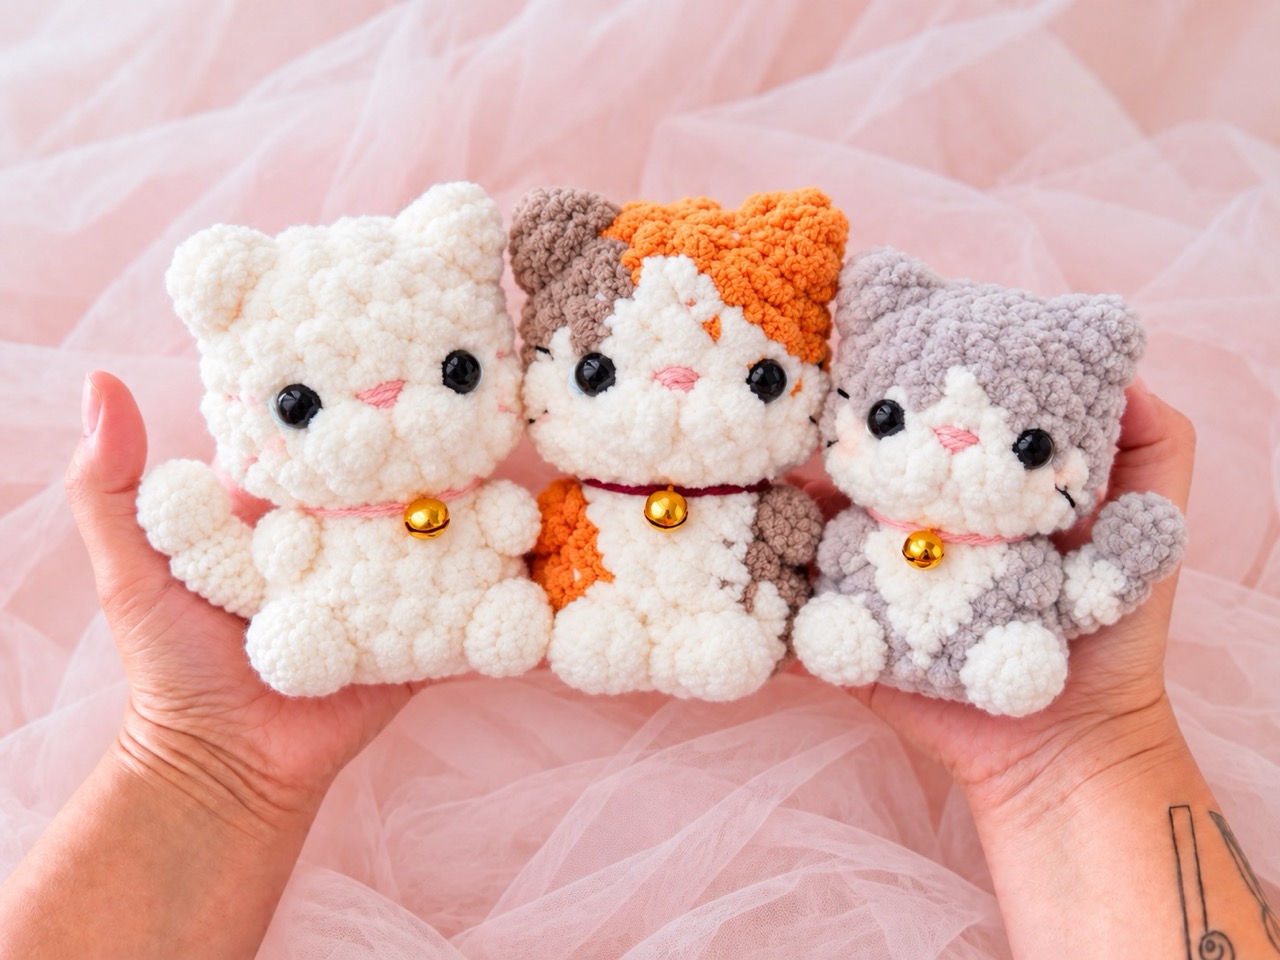
There’s something irresistible about tiny handmade cats. Maybe it’s the way they fit in the palm of your hand, or the way each one has its own little personality — a tuxedo cat, a calico, a Siamese, a gray and white kitten. This crochet mini cats pattern from crochhet.com gives you all of that in one delightful collection. The finished cats are about 9 cm tall, use Scheepjes Catona yarn and a 2.25 mm hook, and come together with simple single crochet shaping. Whether you make just one or all six, you’ll end up with a litter of tiny friends who are as fun to display as they are to cuddle.
Below is a complete guide to the Mini Cats pattern. You’ll find the materials, abbreviations, step-by-step instructions for Cat 1 and how the other five cats vary, plus assembly notes, face details, tips, and answers to common questions.
Jump to a Section
- Why This Crochet Mini Cats Pattern Stands Out
- What You Need Before You Start
- Abbreviations and Special Techniques
- How to Crochet Cat 1: The Siamese Kitten
- How to Crochet Cat 2: The White and Camel Kitten
- How to Crochet Cat 3: The Black and White Tuxedo
- How to Crochet Cat 4: The Gray and White Kitten
- How to Crochet Cat 5: The Black and White Patched Kitten
- How to Crochet Cat 6: The Calico Kitten
- How to Make the Arms, Legs, Ears, and Tail
- Putting Your Crochet Mini Cats Together
- Tips for a Neater Crochet Mini Cats Pattern
- FAQ About the Crochet Mini Cats Pattern
- Your Next Stitch
Why This Crochet Mini Cats Pattern Stands Out
Plenty of amigurumi cat patterns exist, but this collection has a few qualities that make it especially charming.
- Finished size: About 9 cm when using the recommended yarn and hook.
- Skill level: Intermediate beginner. You need to know magic ring, single crochet, increase, decrease, and color changes.
- Yarn: Scheepjes Catona and Yarn and Colors Must-Have.
- Hook: 2.25 mm.
- Eyes: 5 mm safety eyes (2 per cat).
- Six variations: One base pattern, six different color schemes and markings.
- Details: Embroidered nose, whiskers, and navel, plus blush for the cheeks.
- Versatility: Make just one cat or the whole litter. Each one has its own personality.
The pattern includes video tutorials for the stitches and techniques on the designer’s YouTube channel. The designer asks that you respect her copyright — the pattern is for personal use only, but you can sell finished items with credit.
What You Need Before You Start
Gather your supplies first. The pattern uses specific yarns and tools.
Yarn and Hook
- Yarn: Scheepjes Catona and Yarn and Colors Must-Have.
- Cat 1: Limestone (009) and Root Beer (157).
- Cat 2: Bridal White (105) and Camel (502).
- Cat 3: Black (110) and White (105).
- Cat 4: Moon Rock (254) and Bridal White (105).
- Cat 5: Bridal White (105) and Jet Black (110).
- Cat 6: Bridal White (105), Saffron (249), and Jet Black (110).
- Embroidery thread: Scheepjes Maxi Sweet Treat in black (small amount).
- Hook: 2.25 mm.
Notions and Tools
- Safety eyes, 5 mm (2 per cat).
- Stuffing (polyfill, cotton wool, etc.).
- Needle for sewing.
- Scissors.
- Pins.
- Pink or orange blush for the cheeks.
Gauge
- 7 stitches and 7 rows = 2.5 cm (1 inch).
- This gauge matters because it affects the color changes and the finished size.
Abbreviations and Special Techniques
- st — stitch/stitches
- ch — chain
- sl st — slip stitch
- sc — single crochet
- inc — single crochet increase
- dec — single crochet decrease
- hdc — half double crochet
- dc — double crochet
How to Change Colors
Always change colors in the final step of the last stitch of the current color:
- With two loops of the last stitch remaining on the hook.
- Pull the new color through the remaining two loops.
- Continue with the new color.
The designer recommends cutting the old color and tying the tails together on the inside. When changing between dark and light colors, weave in all the dark ends into the back of the dark stitches before stuffing, so the dark color doesn’t show through the light stitches.
Invisible Decrease
When you need to decrease, use the invisible decrease for a neater result. The designer has a video tutorial for this on her YouTube channel.
General Notes
- Crochet in a spiral unless otherwise stated.
- The pattern specifies when to start stuffing. If there’s no mention of stuffing, that part doesn’t need it.
- The position of the eyes is the same for every cat. Refer to Cat 1 for eye placement.
How to Crochet Cat 1: The Siamese Kitten
Cat 1 uses Yarn A (Limestone) and Yarn B (Root Beer).
Head and Body (Begin with Yarn A)
- Rnd 1: 8 sc into a magic ring [8]
- Rnd 2: 8 inc [16]
- Rnd 3: (1 sc, 1 inc) 8 times [24]
- Rnd 4: (2 sc, 1 inc) 8 times [32]
- Rnds 5–6: 1 sc in each st around [32]
- Rnd 7: 7 sc, 1 inc, 7 sc; Yarn B: 1 inc; Yarn A: (7 sc, 1 inc) 2 times [36]
- Rnd 8: 14 sc; Yarn B: 6 sc; Yarn A: 16 sc [36]
- Rnd 9: 12 sc; Yarn B: 10 sc; Yarn A: 14 sc [36]
- Rnd 10: 11 sc; Yarn B: 12 sc; Yarn A: 13 sc [36]
- Rnd 11: 8 sc, 1 inc, 2 sc; Yarn B: 6 sc, 1 inc, 5 sc; Yarn A: 3 sc, 1 inc, 8 sc, 1 inc [40]
- Rnds 12–13: 12 sc; Yarn B: 13 sc; Yarn A: 15 sc [40]
Fasten off Yarn B.
- Rnd 14: (3 sc, 1 dec) 2 times, 2 sc; Yarn B: 1 sc, 1 dec, (3 sc, 1 dec) 2 times; Yarn A: (3 sc, 1 dec) 3 times [32]
Insert safety eyes between rounds 10 and 11. The first eye is between the 14th and 15th stitches, the second eye is between the 20th and 21st stitches. Start stuffing.
- Rnd 15: 1 sc, 1 dec, (2 sc, 1 dec) 7 times, 1 sc [24]
- Rnd 16: (4 sc, 1 dec) 4 times [20]
- Rnd 17: 1 sl st in each st around [20]
- Rnd 18: (4 sc, 1 inc) 4 times [24]
- Rnd 19: 1 sc in each st around [24]
- Rnd 20: (7 sc, 1 inc) 3 times [27]
- Rnd 21: 1 sc in each st around [27]
- Rnd 22: (8 sc, 1 inc) 3 times [30]
- Rnds 23–25: 1 sc in each st around [30]
- Rnd 26: (3 sc, 1 dec) 6 times [24]
- Rnd 27: (1 sc, 1 dec) 8 times [16]
- Rnd 28: 8 dec [8]
Finish stuffing. Fasten off and close the remaining stitches. Using black thread, embroider the nose between the two eyes at rounds 11 and 12. Embroider whiskers below each eye. Using Yarn B, embroider the navel to the center front of the body at round 23. Add blush to the cheeks and nose.
How to Crochet Cat 2: The White and Camel Kitten
Cat 2 uses Yarn A (Bridal White) and Yarn B (Camel).
Head and Body (Begin with Yarn B)
- Rnds 1–3: Work as Cat 1.
- Rnd 4: 1 sc, 1 inc, (2 sc, 1 inc) 3 times; Yarn A: 1 sc; Yarn B: 1 sc, 1 inc, (2 sc, 1 inc) 3 times; Yarn A: 1 sc [32]
- Rnd 5: Yarn B: 14 sc; Yarn A: 3 sc; Yarn B: 13 sc; Yarn A: 2 sc [32]
- Rnd 6: 1 sc; Yarn B: 12 sc; Yarn A: 5 sc; Yarn B: 11 sc; Yarn A: 3 sc [32]
- Rnd 7: 2 sc; Yarn B: 5 sc, 1 inc, 4 sc; Yarn A: 3 sc, 1 inc, 3 sc; Yarn B: 4 sc, 1 inc, 4 sc; Yarn A: 3 sc, 1 inc [36]
- Rnd 8: 3 sc; Yarn B: 9 sc; Yarn A: 10 sc; Yarn B: 8 sc; Yarn A: 6 sc [36]
Fasten off Yarn B, continue with Yarn A.
- Rnds 9–10: 1 sc in each st around [36]
- Rnd 11: (8 sc, 1 inc) 4 times [40]
- Rnds 12–13: 1 sc in each st around [40]
- Rnd 14: (3 sc, 1 dec) 8 times [32]
- Rnds 15–28: Work as Cat 1.
Finish stuffing. Fasten off and close. Embroider the face and navel as Cat 1. Arms: work as Cat 1, all in Yarn A. Legs: work as Cat 1, make 1 in Yarn A, 1 in Yarn B. Ears and tail: work as Cat 1. Assembly: same as Cat 1.
How to Crochet Cat 3: The Black and White Tuxedo
Cat 3 uses Black (Yarn B) and White (Yarn A).
Head and Body (Begin with Black)
- Rnds 1–17: Work as Cat 2 using Black and White.
- Rnd 18: White: (1 inc, 4 sc) 3 times; Black: 1 inc, 4 sc [24]
- Rnd 19: 10 sc; White: 8 sc; Black: 6 sc [24]
- Rnd 20: 1 sc, 1 inc, 7 sc, 1 inc, 1 sc; White: 6 sc; Black: 1 inc, 6 sc [27]
- Rnd 21: 14 sc; White: 4 sc; Black: 9 sc [27]
- Rnd 22: 2 sc, 1 inc, 8 sc, 1 inc, 3 sc; White: 2 sc; Black: 3 sc, 1 inc, 6 sc [30]
Fasten off White, continue with Black.
- Rnds 22–28: Work as Cat 1.
Finish stuffing and close. Embroider the face. Arms, legs, ears, tail, and assembly: work as Cat 1 with Black and White.
How to Crochet Cat 4: The Gray and White Kitten
Cat 4 uses Moon Rock (Gray) and Bridal White.
Head and Body (Begin with Gray)
- Rnds 1–6: Work as Cat 1.
- Rnd 7: (7 sc, 1 inc) 4 times [36]
- Rnd 8: 1 sc in each st around [36]
- Rnd 9: 16 sc; White: 2 sc; Gray: 18 sc [36]
- Rnd 10: 15 sc; White: 4 sc; Gray: 17 sc [36]
- Rnd 11: 8 sc, 1 inc, 5 sc; White: 3 sc, 1 inc, 2 sc; Gray: 6 sc, 1 inc, 8 sc, 1 inc [40]
- Rnd 12: 14 sc; White: 9 sc; Gray: 17 sc [40]
- Rnd 13: 13 sc; White: 11 sc; Gray: 16 sc [40]
- Rnd 14: (3 sc, 1 dec) 2 times, 3 sc; White: 1 dec, (3 sc, 1 dec) 2 times; Gray: (3 sc, 1 dec) 3 times [32]
- Rnd 15: (2 sc, 1 dec) 2 times, 2 sc; White: 1 dec, (2 sc, 1 dec) 2 times; Gray: (2 sc, 1 dec) 3 times [24]
- Rnd 16: 4 sc, 1 dec, 2 sc; White: 2 sc, 1 dec, 3 sc; Gray: 1 sc, 1 dec, 4 sc, 1 dec [20]
- Rnd 17: 8 sl st; White: 7 sl st; Gray: 5 sl st [20]
- Rnd 18: 1 inc, 4 sc, 1 inc, 2 sc; White: 2 sc, 1 inc, 4 sc; Gray: 1 inc, 4 sc [24]
- Rnds 19–28: Work as Cat 3 using Gray instead of Black.
Finish stuffing and close. Embroider the face. Ears: work as Cat 1 using Gray. Arms, legs, tail, and assembly: work as Cat 1 with Gray and White.
How to Crochet Cat 5: The Black and White Patched Kitten
Cat 5 uses Yarn A (Bridal White) and Yarn B (Jet Black).
Head and Body (Begin with Yarn B)
- Rnd 1: 8 sc into a magic ring [8]
- Rnd 2: 4 inc; Yarn A: 4 inc [16]
- Rnd 3: Yarn B: (1 sc, 1 inc) 4 times; Yarn A: (1 sc, 1 inc) 4 times [24]
- Rnd 4: Yarn B: 1 sc, 1 inc, (2 sc, 1 inc) 3 times; Yarn A: (2 sc, 1 inc) 4 times, 1 sc [32]
- Rnd 5: Yarn B: 14 sc; Yarn A: 18 sc [32]
- Rnd 6: 1 sc; Yarn B: 12 sc; Yarn A: 19 sc [32]
- Rnd 7: 2 sc; Yarn B: 5 sc, 1 inc, 4 sc; Yarn A: 3 sc, 1 inc, (7 sc, 1 inc) 2 times [36]
- Rnd 8: 3 sc; Yarn B: 9 sc; Yarn A: 24 sc [36]
Fasten off Yarn B, continue with Yarn A.
- Rnds 9–14: Work as Cat 2.
- Rnds 15–20: Work as Cat 1.
- Rnd 21: 16 sc; Yarn B: 10 sc, Yarn A: 1 sc [27]
- Rnd 22: 8 sc, 1 inc, 6 sc; Yarn B: 2 sc, 1 inc, 8 sc, 1 inc [30]
- Rnds 23–24: Yarn A: 16; Yarn B: 14 sc [30]
- Rnd 25: Yarn A: 17; Yarn B: 12 sc; Yarn A: 1 sc [30]
Fasten off Yarn B, continue with Yarn A.
- Rnd 26: (3 sc, 1 dec) 6 times [24]
- Rnd 27: (1 sc, 1 dec) 8 times [16]
- Rnd 28: 8 dec [8]
Finish stuffing and close. Embroider the face. Ears: work as Cat 1, make 1 with Yarn A, 1 with Yarn B. Arms and legs: work as Cat 1, all in Yarn A. Tail and assembly: work as Cat 1.
How to Crochet Cat 6: The Calico Kitten
Cat 6 uses Yarn A (Bridal White), Yarn B (Saffron), and Yarn C (Jet Black).
Head and Body (Begin with Yarn B)
- Rnd 1: 8 sc into a magic ring [8]
- Rnd 2: 4 inc; Yarn C: 4 inc [16]
- Rnd 3: Yarn B: (1 sc, 1 inc) 4 times; Yarn C: (1 sc, 1 inc) 4 times [24]
- Rnd 4: Yarn B: 1 sc, 1 inc, (2 sc, 1 inc) 3 times; Yarn A: 1 sc; Yarn C: 1 sc, 1 inc, (2 sc, 1 inc) 3 times; Yarn A: 1 sc [32]
- Rnd 5: Yarn B: 14 sc; Yarn A: 3 sc; Yarn C: 13 sc; Yarn A: 2 sc [32]
- Rnd 6: 1 sc; Yarn B: 12 sc; Yarn A: 5 sc; Yarn C: 11 sc; Yarn A: 3 sc [32]
- Rnd 7: 2 sc; Yarn B: 5 sc, 1 inc, 4 sc; Yarn A: 3 sc, 1 inc, 3 sc; Yarn C: 4 sc, 1 inc, 4 sc; Yarn A: 3 sc, 1 inc [36]
- Rnd 8: 3 sc; Yarn B: 9 sc; Yarn A: 10 sc; Yarn C: 8 sc; Yarn A: 6 sc [36]
Fasten off Yarn B and Yarn C, continue with Yarn A.
- Rnds 9–28: Work as Cat 5.
Finish stuffing and close. Embroider the face. Ears: work as Cat 1, make 1 with Yarn B, 1 with Yarn C. Arms and legs: work as Cat 1, all in Yarn A. Tail: work as Cat 1 using Yarn C and Yarn A. Assembly: work as Cat 1.
How to Make the Arms, Legs, Ears, and Tail
Arms (Begin with Yarn B, Make 2)
- Rnd 1: 6 sc into a magic ring [6]
- Rnd 2: (1 inc, 2 sc) 2 times [8]
At the end of Rnd 2, change to Yarn A. Fasten off Yarn B.
- Rnd 3: 1 sc in each st around [8]
Fasten off, leaving a long tail for sewing.
Legs (Begin with Yarn B, Make 2)
- Rnd 1: 8 sc into a magic ring [8]
- Rnd 2: (1 inc, 3 sc) 2 times [10]
At the end of Rnd 2, change to Yarn A. Fasten off Yarn B.
- Rnd 3: 1 sc in each st around [10]
Fasten off, leaving a long tail for sewing.
Ears (Yarn B, Make 2)
- Rnd 1: 6 sc into a magic ring [6]
- Rnd 2: (1 inc, 1 sc) 3 times [9]
- Rnd 3: (2 sc, 1 inc) 3 times [12]
- Rnd 4: (5 sc, 1 inc) 2 times [14]
Fasten off, leaving a long tail for sewing.
Tail (Begin with Yarn B)
- Rnd 1: 6 sc into a magic ring [6]
- Rnds 2–3: 1 sc in each st around [6]
- Rnd 4: 1 dec, 1 sc, 1 inc, 2 sc [6]
At the end of Rnd 4, change to Yarn A. Fasten off Yarn B.
- Rnd 5: 1 sc in each st around [6]
- Rnd 6: 1 dec, 1 sc, 1 inc, 2 sc [6]
Start stuffing, adding more as you go.
- Rnd 7: 1 sc in each st around [6]
- Rnd 8: 1 dec, 1 sc, 1 inc, 2 sc [6]
- Rnds 9–20: 1 sc in each st around [6]
Fasten off, leaving a long tail for sewing.
Putting Your Crochet Mini Cats Together
- Sew the ears to the head at rounds 2 and 7.
- Sew the arms on each side of the body, below the neck.
- Sew the legs on the body, 2 rounds below the arms.
- Sew the tail to the center back of the body at rounds 24 and 25.
- Embroider the nose between the two eyes at rounds 11 and 12.
- Embroider the whiskers below each eye.
- Embroider the navel using Yarn B to the center front of the body at round 23.
- Add blush to the cheeks and nose.
Tips for a Neater Crochet Mini Cats Pattern
- Check your gauge. The 7 stitches and 7 rows = 1 inch gauge matters for the color changes and finished size.
- Use invisible decreases. They make the shaping look smoother.
- Change colors on the last stitch. This keeps the color transitions clean.
- Weave in dark ends before stuffing. Dark yarn can show through light stitches if you don’t.
- Pin before sewing. Placement makes a big difference for the ears and limbs.
- Stuff as you go. The pattern tells you when to start stuffing.
- Embroider the face before attaching the ears. It’s easier to reach the front without the ears in the way.
- Use blush sparingly. A little goes a long way for the cheeks and nose.
FAQ About the Crochet Mini Cats Pattern
What skill level is this crochet mini cats pattern?
It’s intermediate beginner. You need to know magic ring, single crochet, increase, decrease, and color changes.
How big are the finished mini cats?
About 9 cm tall when using Scheepjes Catona yarn and a 2.25 mm hook.
What yarn is used for this crochet mini cats pattern?
The pattern uses Scheepjes Catona and Yarn and Colors Must-Have. Each cat uses two or three colors.
What size safety eyes do the cats need?
5 mm safety eyes (2 per cat).
How many cats can I make from this pattern?
The pattern includes instructions for six different cats — a Siamese, a white and camel kitten, a tuxedo, a gray and white kitten, a black and white patched kitten, and a calico.
Where do I place the eyes?
Insert the safety eyes between rounds 10 and 11. The first eye is between the 14th and 15th stitches, the second eye is between the 20th and 21st stitches.
Your Next Stitch
This crochet mini cats pattern is one of those projects that brings a smile every time you finish one. They’re small enough to make in an evening, detailed enough to feel rewarding, and cute enough that you’ll want to make the whole litter. Whether you keep them for yourself, give them as gifts, or sell them at a craft fair, you’ll end up with a collection of tiny cats who each have their own personality.
So gather your Scheepjes Catona yarn, pick up your 2.25 mm hook, and start with that first magic ring. If you get stuck on the color changes or the assembly, come back to this guide and work through it step by step. And when your mini cats are finished, share them , and show off your work. Your next project might be exactly what someone else needs to see.
Happy crocheting!