Crochet Helllo Kiitty Amigurumi Pattern Craft Your Own Pop
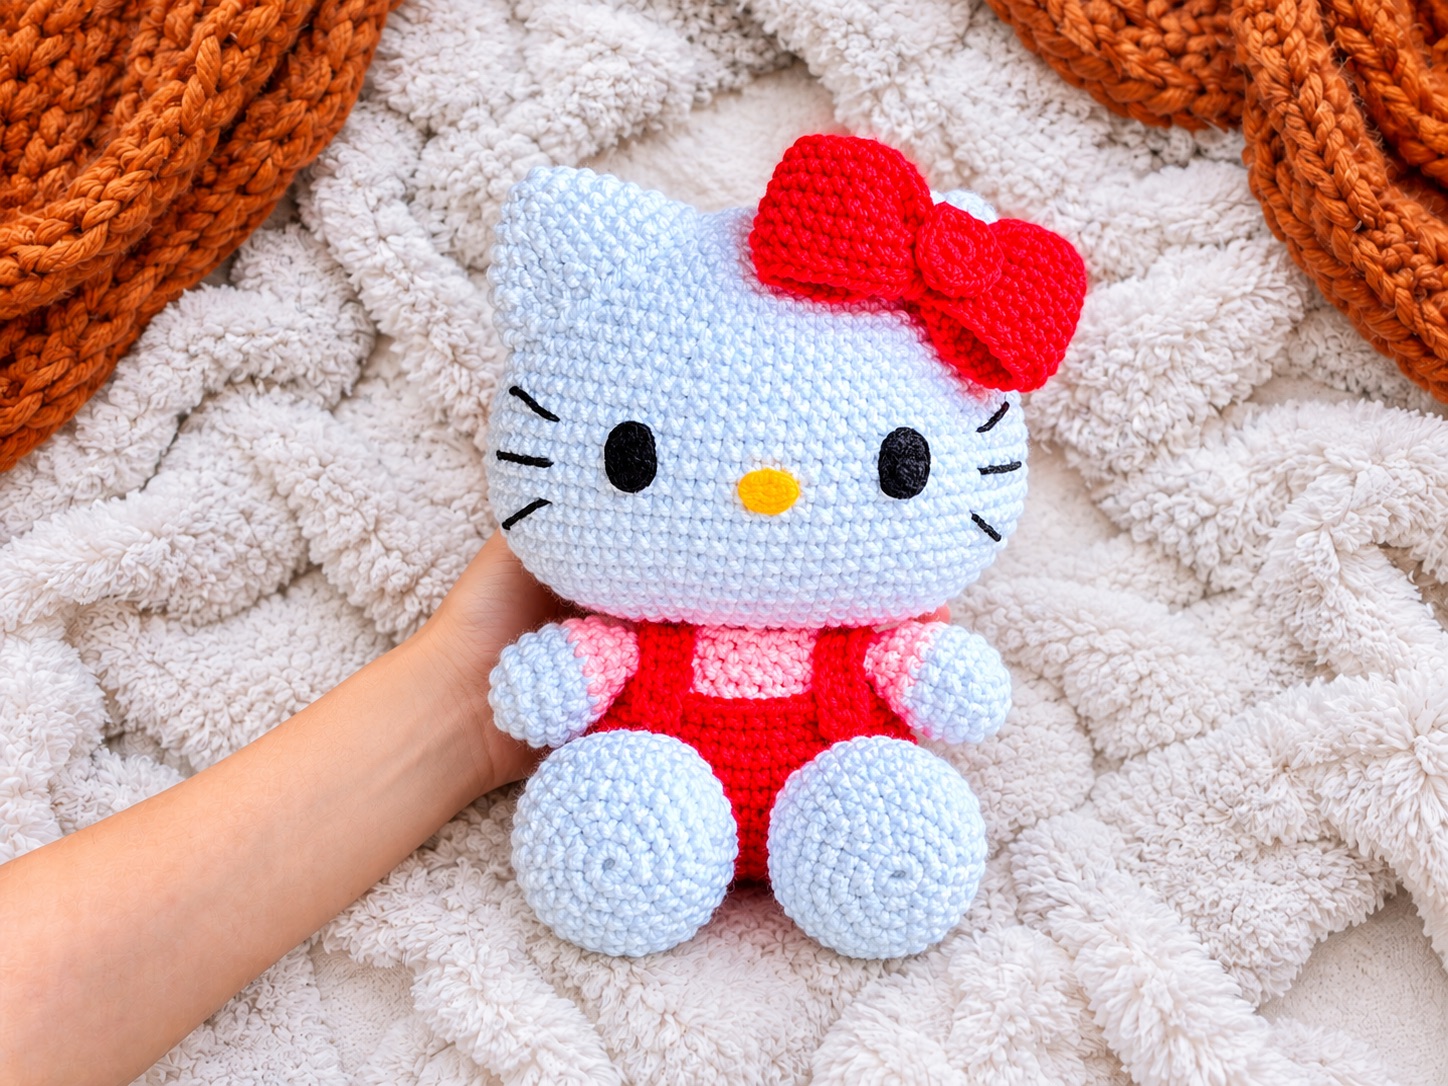
There is a timeless charm in crocheting globally beloved characters into cute, huggable plushies. If you love classic Sanrio designs, you will adore crafting this adorable Hello Kitty amigurumi. this detailed pattern brings the iconic feline friend to life complete with her classic red overalls and signature hair bow.
Project Overview and Specifications
- Finished Size: Hello Kitty stands approximately 15 cm high and 12 cm wide, though slight variations of 1 to 2 cm can occur depending on your yarn tension and materials.
- Crochet Technique: The pattern is worked in a continuous spiral. The designer recommends using the X-shape single crochet method for a neat finish, though a standard V-shape works well too.
Essential Materials and Tools Checklist
Gathering the correct components ensures your project maintains its professional look:
- Yarn: 2 mm thick yarn in white, red, pink, and black colors.
- Crochet Hook: A 2.0 mm hook.
- Notions: Wool needle, silicone stuffing, black and yellow felt, scissors, stitch markers, pins, and liquid silicone.
Core Crochet Abbreviations (US Terminology)
- MR: Magic Ring
- Ch: Chain
- sc: Single crochet
- inc: Increase
- dec: Decrease
- sl st: Slip stitch
- hdc: Half double crochet
- dc: Double crochet
- BLO / FLO: Back Loop Only / Front Loop Only
Step-by-Step Construction Guide
1. The Head
- Start with white yarn by making 14 chains, working around both sides of the chain foundation to build an oval base.
- Expand outward through targeted increase rounds until reaching 72 stitches, maintaining straight rounds before tapering down with decreases.
- Stuff firmly before closing the final round. The initial foundation side serves as the base that attaches to the body.
2. Ears and Facial Features
- Ears: Make two in white yarn, starting with 6 sc in a MR and increasing up to 30 stitches. Leave a tail for sewing and stuff them lightly.
- Eyes and Nose: Cut two black felt ovals for the eyes and a yellow felt oval for the nose, then glue them securely into place.
- Whiskers: Embroider three whiskers on each side extending outward from alignment with the eyes.
3. Body and Overalls
- Begin with red yarn by chaining 14 and working around both sides to form the overalls base.
- Work straight rounds in red, then switch to pink at round 11 by working in the BLO (Back Loop Only) to transition into her pink shirt.
- Hook red yarn into the remaining free loops of round 11 to create a clean rim hiding the color change. Stuff the body and sew it to the head.
4. Arms and Suspenders
- Arms: Make two in white, working from a magic ring and changing to pink before stuffing the white section only, flattening, and closing with 4 sc.
- Suspenders: Create two strips using red yarn chains and half double crochets, then glue them onto the shoulders using liquid silicone.
5. Legs, Tail, and Sitting Support
- Legs: Make two spherical white pieces starting from a magic ring and expanding to 30 stitches before decreasing down to 12 stitches. Stuff and sew them to the bottom of the body.
- Tail: A small white piece built from a magic ring and stuffed to act as a physical support prop, helping Hello Kitty sit upright on her own.
6. The Signature Bow
- Using red yarn, make 38 chains and close in a circle to work in rounds rather than a spiral for 7 rows.
- Wrap yarn tightly around the center multiple times to pinch and form the bow shape.
- Create a small center covering piece using a 6 sc magic ring followed by 6 increases, then glue it over the middle before securing the entire bow to the head.
Frequently Asked Questions (FAQ) About Hello Kitty Amigurumi Pattern
What size yarn and hook should I use?
The pattern requires a 2.0 mm crochet hook paired with 2 mm thick yarn in white, red, pink, and black.
How are the facial features attached?
The eyes and nose are shaped from black and yellow felt and attached using liquid silicone rather than plastic safety eyes.
How does the finished doll stay upright?
The combination of positioned lower legs and a specially stuffed tail at the back acts as a stable tripod support, allowing Hello Kitty to sit down naturally.
Conclusion and Sharing Your Work
Creating this charming Hello Kitty amigurumi is a wonderful project for fans of Sanrio and cute amigurumi. Once your little masterpiece is complete, don’t forget to take pictures and share it on social media so she can admire your creation!