Stitch Guide to the Crochet Pattern Bat
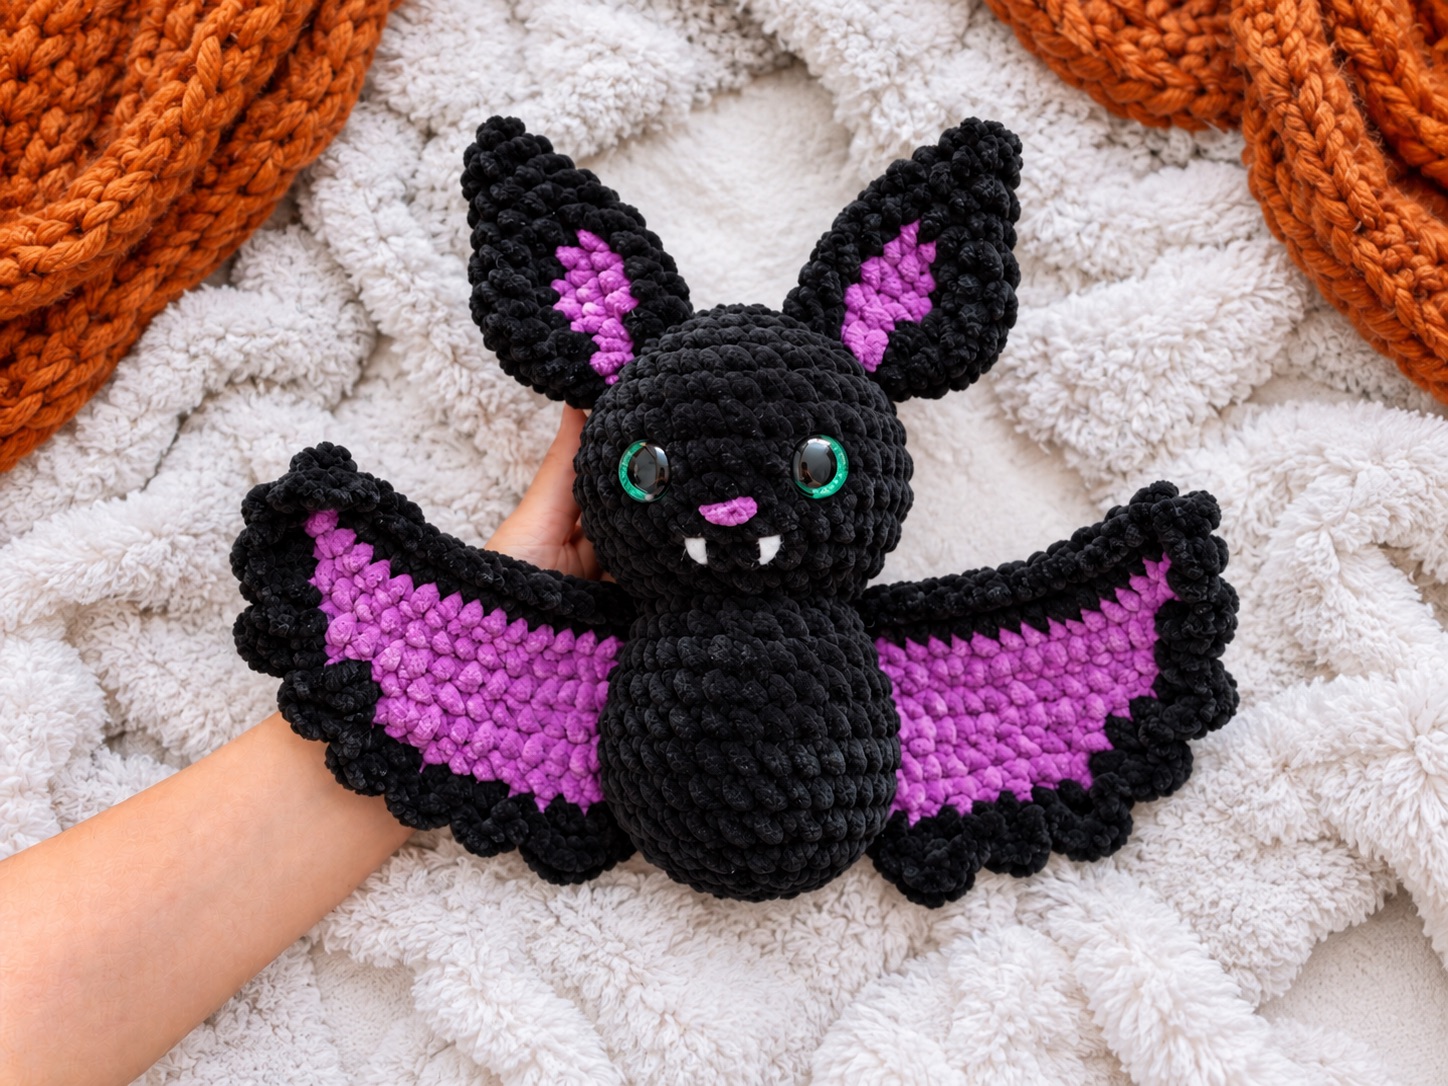
There is a unique kind of joy that comes from turning a ball of yarn into a whimsical little creature, especially one as charming as a plush bat. Whether you are crafting spooky decor for the autumn season or making an adorable keepsake for a friend who loves gothic cute aesthetics, diving into a two-tone bat project is a wonderfully rewarding experience. By following this Crochet pattern bat guide by QZYA, you can effortlessly transform simple black and purple yarn into a treasured handmade friend.
Essential Materials and Tools for Your Bat Crochet Project
Before you cast on your first stitch, gathering the correct supplies will ensure your finished bat looks polished and holds its shape nicely.
- Yarn Requirements:
- Black yarn (such as Vazell Baby Smail, color 10).
- Purple yarn (such as Vazell Baby Smail, color 17).
- Pink yarn for the nose embroidery (such as YarnArt Baby, color 217).
- Notions and Tools:
- 3 mm crochet hook.
- 14 mm safety eyes.
- Toy filler, such as holofiber.
- Sewing needles and scissors.
Mastering Abbreviations and Basic Stitches
To keep your workflow seamless, review these standard crochet terms used throughout the pattern:
- MR: Magic ring
- sc: Single crochet (note: source lists single chain/sc, worked in spirals)
- inc: Increase (work 2 sc in one stitch)
- dec: Decrease (work 2 sc together)
- sl st: Slip stitch
- dc: Double crochet
- ch: Chain
Step-by-Step Construction Guide for the Crochet Pattern Bat
This pattern is worked continuously in spiral rounds without joining at the end of each round, giving it a clean, seamless look.
Head-Body Construction
- The Head Section: Begin with a magic ring of 6 sc, expanding outward through regular increases until you reach 36 sc across rounds 6 through 9.
- Eye Placement & Shaping: Insert your 14 mm safety eyes between rounds 8 and 9, spaced about 4 stitches apart. Decrease down to 18 sc to form the neck before increasing again to shape the main body.
- Body and Stuffing: Work through the body rounds up to 30 sc, stuff the head and body firmly with holofiber, and then decrease down to 6 sc. Cut your yarn, weave through the outer loops, and pull tight to close.
Crafting the Two-Tone Ears
- Left and Right Ears: Both ears start with black yarn in a magic ring and expand outward. Around round 6, you will incorporate purple yarn to introduce the two-tone color effect before decreasing down to 9 sc. Leave a long tail for sewing, and leave the ears unstuffed.
Wing Details (Make 2)
- Working in Rows: Leaving a 15–20 cm tail for sewing, start with black yarn and chain 17. Work back into the single crochets rather than the chain loops.
- Color Shifting and Feathers: Switch to purple yarn for intermediate rows featuring slip stitches and single crochets, then switch back to black to create the scalloped “feather” edge using triple-dc clusters and slip stitches along the triangle’s long edge.
Assembly and Final Design Details
Bringing your bat to life relies on careful positioning and sweet facial features:
- Attaching Parts: Pin the ears to the middle of the head, placing them about 2 rows down and slightly to the sides. Secure the wings to the body just below the ears, ensuring they align neatly.
- Facial Expression: Embroider the nose using pink yarn between rows 9 and 10, positioned midway between the eyes. Add vampire fangs either by embroidering them or by cutting small shapes out of felt and gluing them one row under the nose.
Frequently Asked Questions (FAQ)
1. What size hook and yarn are recommended for this Crochet pattern bat?
The pattern suggests using a 3 mm crochet hook paired with Vazell Baby Smail yarn (black and purple) along with YarnArt Baby pink yarn for the nose accents. However, you can substitute alternative yarn weights and hook sizes depending on your personal preference.
2. Should I join rounds when working the head and body?
No, the head and body components are worked in continuous spiral rounds without joining at the end of each round with a slip stitch. Using a stitch marker at the beginning of each round will help you keep track of your counts.
3. How do I handle color changes in the ears?
When the pattern specifies a color switch—such as changing to purple (purp) or black (blk)—you simply drop the current working yarn and pick up the new color for the designated stitches as indicated in the row instructions.