Create a Timeless Accessory with “An Italian Bandana” Knitting Pattern
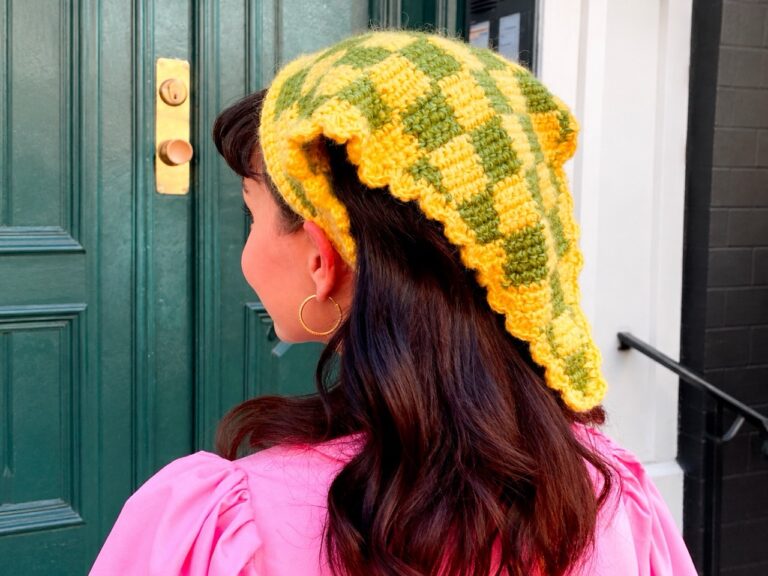
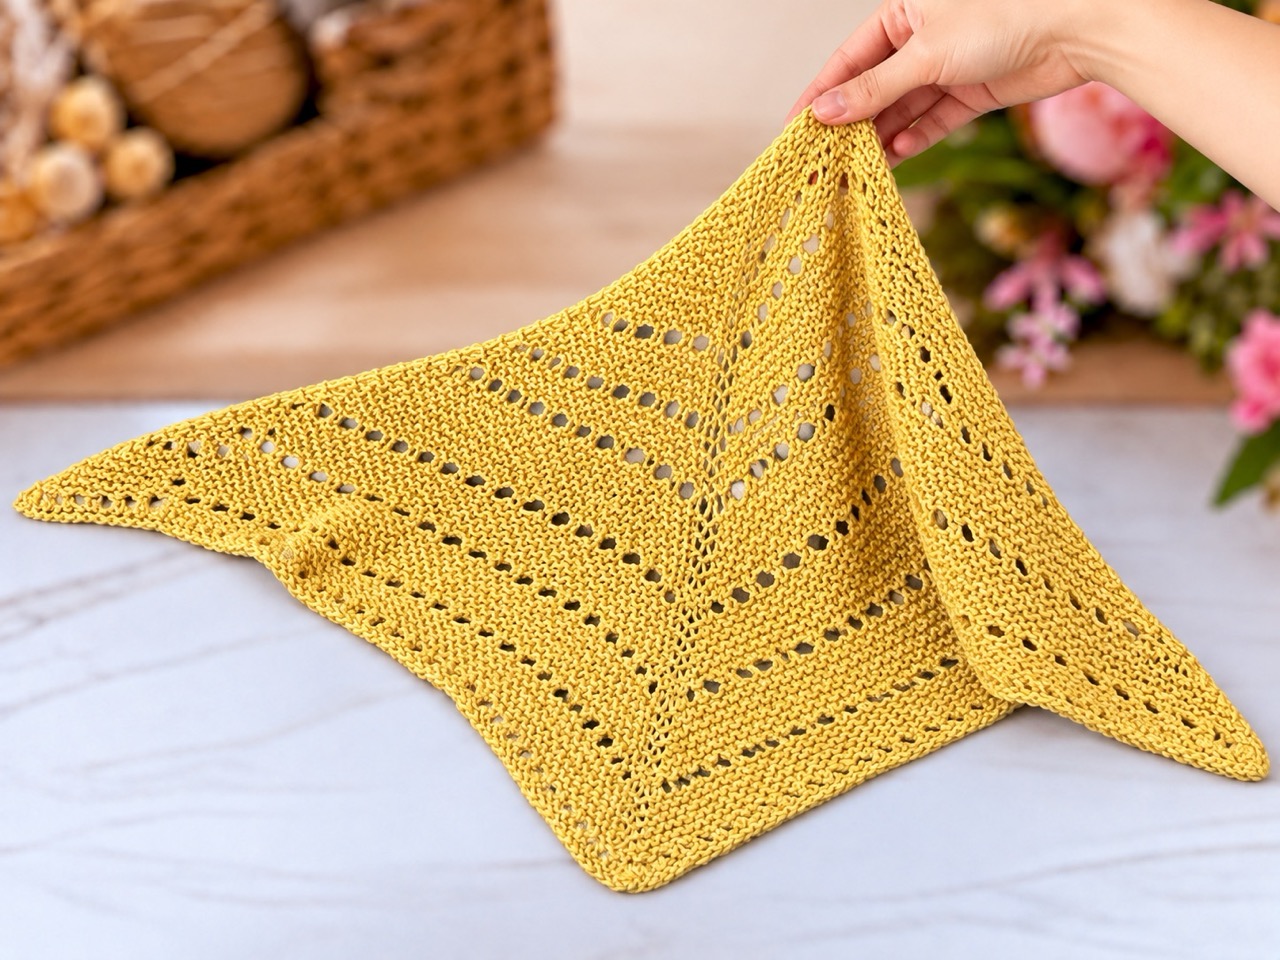
An Italian Bandana is a charming and versatile little neck accessory created to keep you company through every change of the seasons. Whether you choose to knit it using a cozy, warm yarn for the chilly winter months or opt for a fresh, plant-based fiber for a lightweight summer statement piece, this pattern offers an engaging and rewarding project for knitters of all skill levels.
When completed using the standard measurements, the bandana stretches to a length of approximately 70 cm (27 inches) from tip to tip, with a center width of around 25 cm (10 inches). If you love sharing your handmade wardrobe updates with the online crafting community, you can share photos of your completed projects using the hashtag #anitalianbandana.
Materials, Needles, and Gauge Specifications
To achieve the beautiful texture and drape shown in the pattern photos, gather the appropriate materials before casting on your stitches:
- Yarn Option 1: 50 grams of Drops Belle, which provides 120 meters (131 yards) per 50 g ball.
- Yarn Option 2: 50 grams of Drops Lima, providing 100 meters (109 yards) per 50 g ball.
- Needles: 5 mm (US 8) circular needles that are at least 80 cm (32 inch) long. Alternatively, if you prefer working with traditional straight needles, you can easily use them instead since the pattern is worked flat.
- Additional Tools: Two stitch markers to help manage increases around the center stitch, and an optional removable stitch marker to track your right side.
- Gauge: 16 stitches and 28 rows equal 10 cm (4 inches) worked in garter stitch.
Important Design Notes and Tips for Success
Before you cast on your first stitch, keep these helpful insights from the designer in mind:
- Working Flat: The bandana is worked flat, back and forth in rows. There is no purling required throughout the entire pattern—it relies entirely on garter stitch and simple eyelet rows.
- Managing Increases: Because you will be working increases around a designated center stitch, it is necessary to use two stitch markers to keep your work organized.
- Side Identification: After knitting your first few rows, placing a removable stitch marker on the right side (RS) of your work makes it much easier to differentiate it from the wrong side (WS).
- Customizing Size: If you want to create a larger bandana, you can easily do so by using more yarn than the recommended single ball and continuing to work the pattern until you run out of yarn.
- Tracking Rows: If you ever lose track of your row count, look at your work and count how many “garter bump” rows you have created since your last eyelet row. If you count 6 garter bumps, it is time to work another eyelet row (Row 11).
Comprehensive Stitch Abbreviations Guide
To follow the pattern instructions smoothly, familiarize yourself with these standard knitting terms:
- RS: Right side of your work.
- WS: Wrong side of your work.
- k: Knit.
- sts: Stitches.
- k1: Knit 1 stitch.
- kfb: Knit front and back. Knit the same stitch first through the front loop and then through the back loop, which increases your stitch count by 1 stitch (+1 st).
- m1r: Make one right. Pick up the bar between 2 stitches from the back towards the front with your left-hand needle and knit it, increasing your stitch count by 1 stitch (+1 st).
- m1l: Make one left. Pick up the bar between 2 stitches from the front towards the back with your left-hand needle and knit it through the back loop, increasing your count by 1 stitch (+1 st).
- yo: Yarn over. Bring the yarn over the right needle to create an extra stitch, increasing your stitch count by 1 stitch (+1 st).
- k2tog: Knit 2 stitches together, which decreases your stitch count by 1 stitch (-1 st).
Step-by-Step Knitting Pattern Instructions
Cast-On and Setup Rows
- Begin by casting on 3 stitches onto your 5 mm (US 8) circular or straight needles.
- Setup Row 1 (RS): Knit front and back (
kfb), place marker, knit the center stitch, place marker, knit front and back (kfb). This increases your total by 2 stitches. - Setup Row 2 (WS): Knit to the marker, slip marker, knit the center stitch, slip marker, and knit to the end of the row.
The Core Garter and Eyelet Sequence
- Row 1 (RS): Knit 1 (
k1), make one left (m1l), knit until you reach the stitch marker, make one right (m1r), slip marker, knit the center stitch, slip marker, make one left (m1l), knit until one stitch remains, make one right (m1r), knit 1 (k1). This row adds 4 stitches in total. - Row 2 (WS): Knit to the marker, slip marker, knit the center stitch, slip marker, and knit to the end of the row.
- Rows 3 through 10: Repeat Rows 1 and 2 another 4 times, adding a total of 16 stitches across these rows.
- Row 11 (RS): Knit 1 (
k1), make one left (m1l), yarn over (yo), knit 1 (k1), repeat[yo, k2tog]until 2 stitches remain before the marker,yo, knit 1 (k1),yo, knit 1 (k1), slip marker, knit the center stitch, slip marker, knit 1 (k1),yo, knit 1 (k1), repeat[yo, k2tog]until 2 stitches remain,yo, knit 1 (k1),yo, make one right (m1r), knit 1 (k1). This eyelet row increases your stitch count by 8 stitches. - Row 12 (WS): Knit to the marker, slip marker, knit the center stitch, slip marker, and knit to the end of the row.
Continuation and Completion
- Continue repeating Rows 1 through 12 until you have just enough yarn left to work the cast-off edge, or until you are completely happy with the size of your bandana.
- Make sure to end your final repeat after completing any Wrong Side (WS) row.
- Finish your beautiful Italian Bandana by binding off using an Icelandic bind-off method.
- Finally, weave in all loose ends securely with a tapestry needle, block your piece if desired, and enjoy wearing your handmade accessory!