Crafting Adorable Teddy Bear with This Crochet Pattern
There is a profound, comforting sort of joy that comes from watching a soft skein of plush chenille yarn turn into a warm, huggable companion under your crochet hook. If you love creating lovable amigurumi projects that double as lifetime keepsakes, you are going to fall completely in love with this project a wonderfully velvety texture, expressive facial features, and the delightful option to crochet him either bare or dressed in the coziest little pajamas complete with a matching sleeping cap.
Discovering the Charm of Marty the Teddy Bear
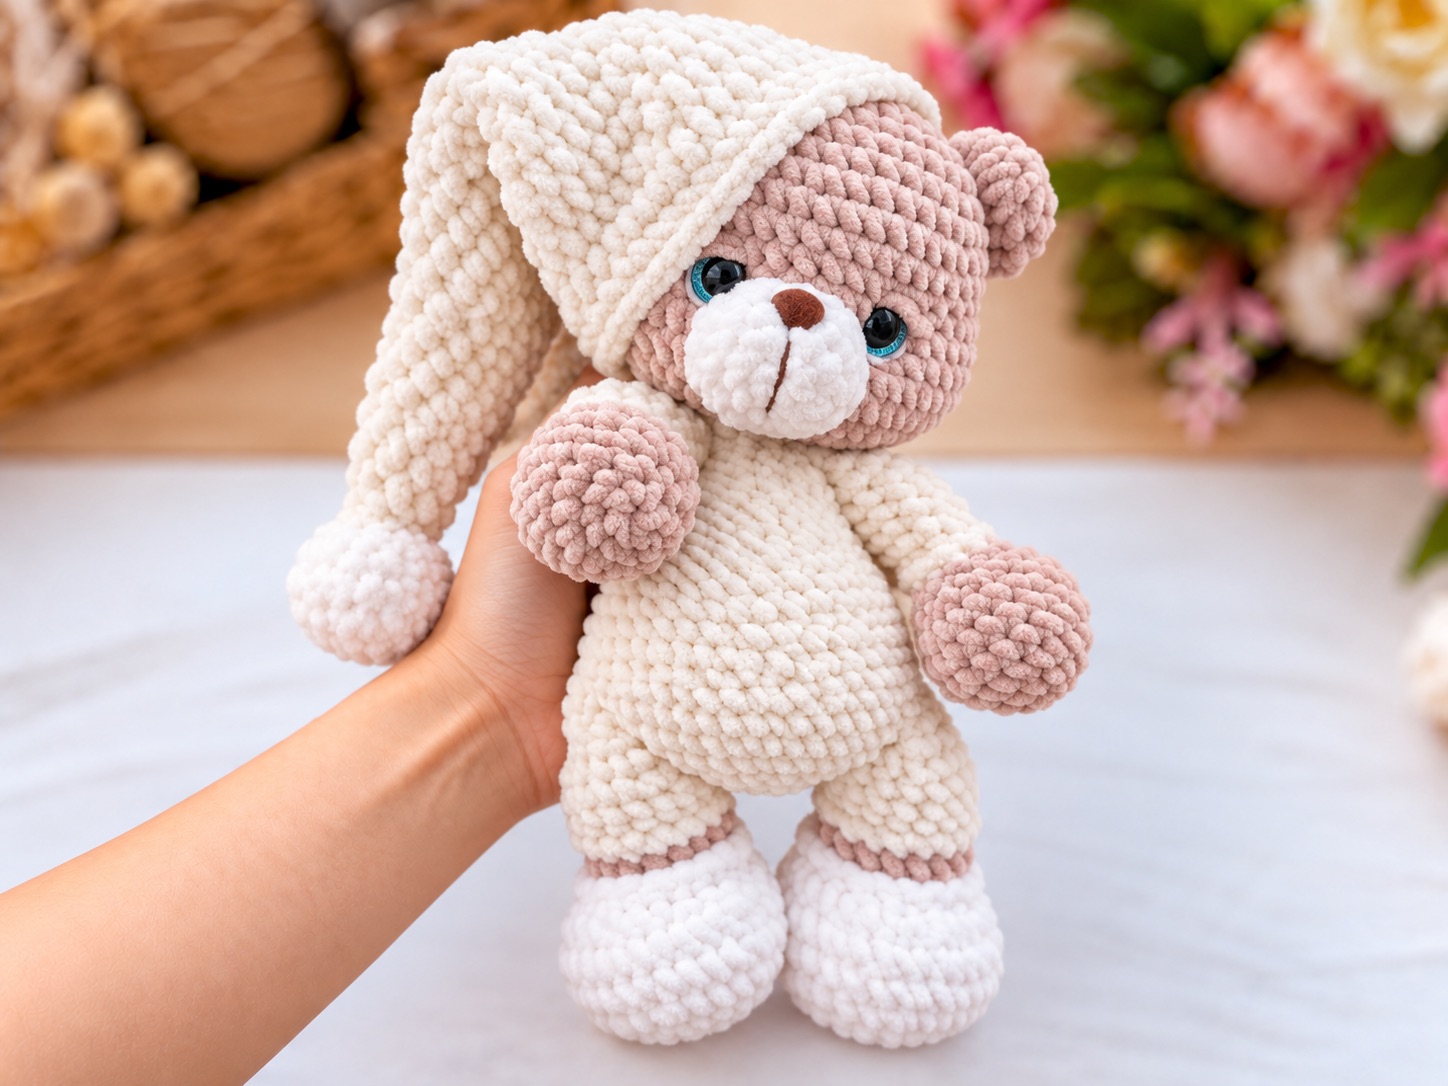
Designed with incredible attention to detail, Marty stands out as a versatile amigurumi pattern that lets you customize your creation’s style. Whether you prefer a classic, natural teddy bear look or a bedtime-ready character wearing custom pajamas and slippers, this guide breaks down everything you need to bring your sweet little bear to life.
Essential Supplies and Materials Checklist
Gathering the right tools before you begin ensures a smooth and frustration-free crocheting experience. Depending on whether you are making the classic bear or the pajama-clad version, your supply list will vary slightly:
- For the Classic Bear: You will need Super Bulky / 14-ply chenille yarn (such as YarnArt Dolce No.747—about 1.5 skeins), cream yarn (No. 745) for the snout, and a bit of white yarn for the eyes.
- For the Pajama Bear: You will need about half a skein of YarnArt Dolce No.747 for the main body, No.741 for slippers/snout accents, and Himalaya Dolphin Baby (No.347—about 1.5 skeins) for the pajamas and cap.
- Detailed Accents: Fine/4-ply yarn (like YarnArt Jeans No.70).
- Hardware: 16 mm glitter safety eyes and a 12*15 mm velvet brown nose.
- Notions: Fiberfill stuffing material, a yarn needle, scissors, a lighter (used strategically to melt and secure hardware plastics), and your crochet hook.
- Hook Size: An optimal hook size between 3.5 mm and 5 mm (a 5 mm hook is standard, though you can choose what fits your personal gauge).
Core Abbreviations and Amigurumi Tips
To keep your pattern reading effortless, memorize these standard abbreviations used throughout the design:
- MR: Magic ring
- SC: Single crochet
- SL ST: Slip stitch
- INC: Increase (two single crochets in one stitch)
- DEC: Decrease (crochet two single crochets together)
- CH: Chain
- DC / HDC: Double crochet / Half double crochet
- HDC2TOG: Crochet two half double crochets together
- $\*$: Number of repetitions in the round
- $N$: Total number of stitches in the round
Pro Tip for Success: The toy is crocheted in a continuous spiral. Always place a contrasting thread marker at the end of each round to track your progress. Do not make a turning chain at the end of rounds, as this prevents unsightly seams from forming.
Step-by-Step Construction of Marty
Crafting the Expressive Head and Snout
- The Head: Begin with a magic ring and work your way outward through sequential increase rounds up to 48 stitches, inserting your 16 mm safety eyes securely between rounds 12 and 13.
- The Lighter Trick: After attaching the safety eye plugs, use a lighter to carefully burn and melt the plastic tips, then flatten them with the back of the lighter to lock the eyes permanently in place.
- The Snout: Crochet the separate snout piece using your cream yarn, attach the velvet brown nose using the same melting technique with your lighter, and sew the finished snout between rounds 12 and 19 of the head.
- Needle Sculpting & Design: Perform needle sculpting using strategic entry points (A, B, C, D) to create deep cheek contours, then embroider sweet eyelids and eyebrows using your yarn needle.
Shaping the Hind and Forelegs
- Hind Legs: Both the right and left hind legs are constructed with specific closure directions (one closing at the toe, the other at the heel) so that the wrong side of the flat closure faces inward when joined to the body.
- Forelegs: Worked in continuous rounds and folded flat at the top, ensuring neat stitches ready for body integration.
- Pajama Variations: If making the pajama version, you will incorporate clever color changes and back-loop-only (BLO) rounds to create adorable built-in slippers and pajama cuffs.
Crocheting the Body and Tail
- The Tail: Make a quick small tail using 6 sc in a MR, increase, and decrease rounds, then sew it right above the hind legs.
- Body Assembly: Crochet the main body in continuous rounds while actively joining the hind legs in round 8 and the forelegs in round 23.
The Cozy Sleeping Cap and Pompom
- The Cap: Chain 48, join in a circle, and work in a spiral using HDC and DC stitches, gradually decreasing down to the crown.
- The Pompom: Form a quick mini sphere using a magic ring and single crochets, then sew it securely to the tip of the cap.
Frequently Asked Questions (FAQ) About Marty the Teddy Bear
What yarn is best for crocheting Marty the Teddy Bear?
The pattern calls for Super Bulky / 14-ply chenille yarns such as YarnArt Dolce or Himalaya Dolphin Baby, which give the bear its signature velvety softness and plush volume.
How do you keep the safety eyes from ever pulling out?
After snapping the plastic backing plugs onto the safety eye posts, you can use a lighter to melt the protruding plastic tip and flatten it down with a hard tool surface, permanently securing the hardware.
What is the difference between the classic bear and the pajama bear?
While the head, ears, snout, and overall head shaping remain identical, the pajama version features colorful clothing integration, built-in slippers using back-loop-only stitches, and a matching sleeping cap with a pompom.
Do I need to make turning chains between rounds?
No, Marty is crocheted in a continuous spiral using a stitch marker, which helps you avoid creating visible, uneven seams.
Conclusion and Call to Action
Bringing Marty the Teddy Bear to life is an immensely satisfying project that rewards your patience with an heirloom-quality plush toy. Whether you craft him as a classic cuddle buddy or dress him up in pastel bedtime pajamas, your handmade creation will bring instant warmth to any room.
Are you going to crochet Marty as a classic bear or give him cozy pajamas? Let us know your color choices in the comments below, and once your adorable little bear is finished, don’t forget to take plenty of pictures and share your tags online! Happy hooking!