Crochet Pattern Helllo Kiitty Funko-Style Hello Kitty
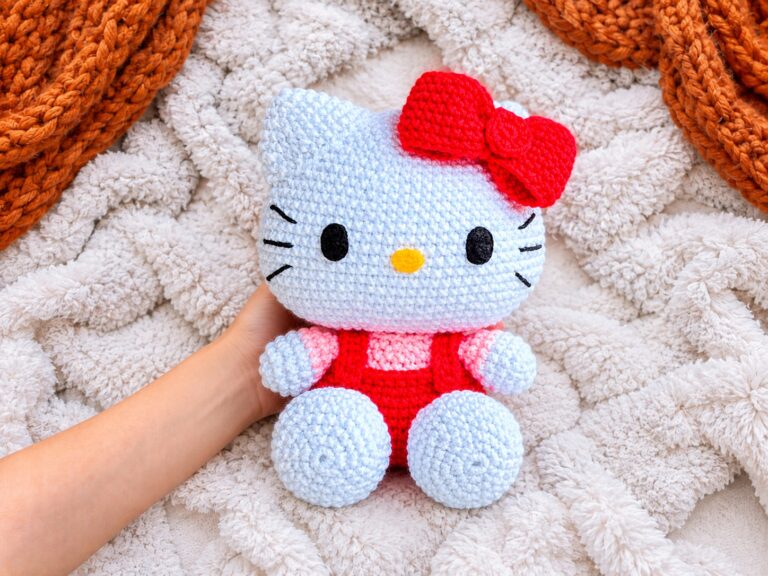
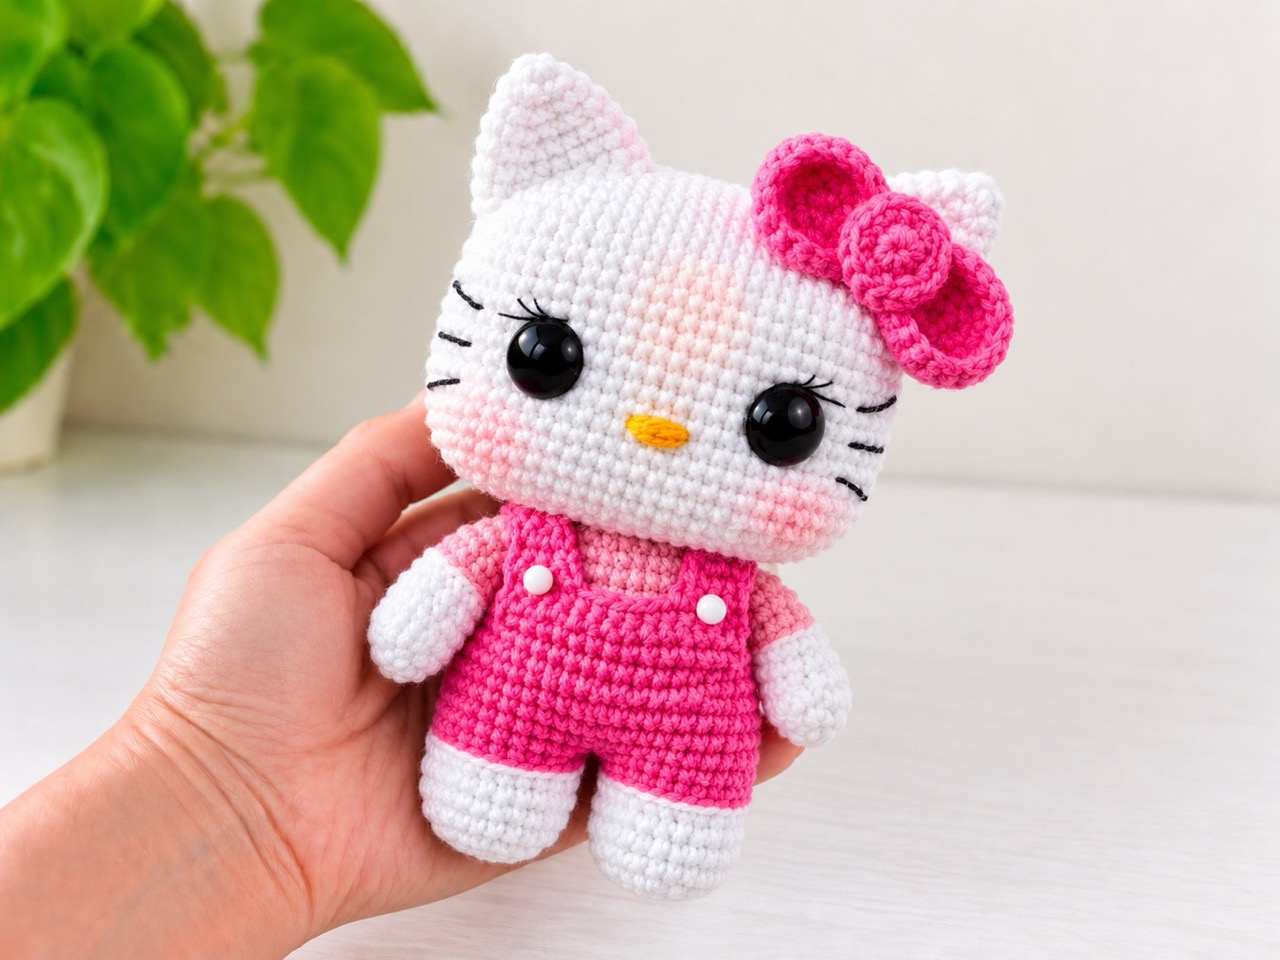
There’s something timeless about Hello Kitty. Maybe it’s the simple face, the iconic bow, or the way she’s been part of our lives for generations. This crochet pattern Hello Kitty captures that charm in a Funko-style amigurumi that’s about 12 cm tall. The head is shaped like a soft cube — a signature of the Funko look — and you can dress her in pink overalls or a full graduation outfit complete with a toga, sash, and mortarboard cap with a tassel. Whether you make her for yourself, a child, or a fellow Hello Kitty fan, you’ll end up with a handmade friend who looks like she stepped right out of a collectible box.
Below is a complete guide to the Hello Kitty pattern. You’ll find the materials, abbreviations, step-by-step instructions for the head, ears, bow, arms, legs, body, overalls, and the graduation outfit, plus assembly notes, tips, and answers to common questions.
Jump to a Section
- Why This Crochet Pattern Hello Kitty Stands Out
- What You Need Before You Start
- Abbreviations and Special Stitches
- How to Crochet the Hello Kitty Head
- How to Crochet the Ears and Bow
- How to Crochet the Arms
- How to Crochet the Legs and Body
- How to Crochet the Overalls
- How to Crochet the Graduation Outfit
- Putting Your Crochet Pattern Hello Kitty Together
- Tips for a Neater Crochet Pattern Hello Kitty
- FAQ About the Crochet Pattern Hello Kitty
- Your Next Stitch
Why This Crochet Pattern Hello Kitty Stands Out
Plenty of Hello Kitty patterns exist, but this one has a few qualities that make it especially charming.
- Style: Funko-inspired with a cube-shaped head.
- Finished size: About 12 cm tall when using the recommended yarn and hooks.
- Skill level: Intermediate.
- Yarn: 100% cotton yarn (4 strands), such as Quesitos de la Colonial or your preferred brand.
- Hooks: 2.00 mm for the head and 1.5 mm for the body, or sizes that match your tension.
- Eyes: 12 mm safety eyes.
- Two outfits: Pink overalls with straps and buttons, or a graduation set with toga, sash, and mortarboard cap.
- Details: Embroidered whiskers, a yellow nose, a pink bow, and blush for the cheeks.
- Construction: Head, ears, bow, arms, legs, body, and outfits are made separately and sewn together.
- Photo support: The pattern includes extensive step-by-step photos.
What You Need Before You Start
Gather your supplies first. The pattern uses specific yarns and tools for the best results.
Yarn and Hook
- Yarn: 100% cotton yarn (4 strands) in white, pink, and a small amount of yellow for the nose. Choose colors for the overalls and graduation outfit as you like.
- Crochet hooks:
- 2.00 mm for the head, hair, and cap.
- 1.5 mm for the body and outfits.
- Stitch markers.
- Fiberfill stuffing.
- Safety eyes: 12 mm (1 pair).
- Fabric glue.
- Pins, scissors, and yarn needle.
- Blush for the cheeks.
- Optional: small buttons or beads for the overall straps.
Tips and Advice
- Use a hook that matches your yarn and feels comfortable.
- Keep your tension tight, especially when changing colors.
- The designer recommends the X-shaped single crochet for a neater finish.
- Stuff as you go, shaping the head carefully to maintain the cube shape.
Abbreviations and Special Stitches
- V — vuelta (round)
- AM — anillo mágico (magic ring)
- CAD — cadena (chain)
- PD — punto deslizado (slip stitch)
- PB — punto bajo (single crochet)
- MPA — medio punto alto (half double crochet)
- AUM — aumento en puntos bajos (single crochet increase)
- AUMT — aumento triple (3 sc in one stitch)
- DISM — disminución (decrease)
- BLO — tejer por hebra trasera (back loop only)
- FLO — tejer por la hebra delantera (front loop only)
- PBJ — puntos bajos juntos (sc together)
- PA — puntos altos (double crochet)
How to Crochet the Hello Kitty Head
The head is worked in the shape of a cube. Start with a rectangular base and finish with a small tube that will be tucked inside to fit the body. The eyes are placed on the front (the wider side).
- V1: 8 pb in AM
- V2: 8 aum (16 pb)
- V3: 2 aum, 1 pb, 2 aum, 3 pb, 2 aum, 1 pb, 2 aum, 3 pb (24 pb)
- V4: 1 pb, 2 aum, 3 pb, 2 aum, 5 pb, 2 aum, 3 pb, 2 aum, 4 pb (32 pb)
- V5: 2 pb, 2 aum, 5 pb, 2 aum, 7 pb, 2 aum, 5 pb, 2 aum, 5 pb (40 pb)
- V6: 3 pb, 2 aum, 7 pb, 2 aum, 9 pb, 2 aum, 7 pb, 2 aum, 6 pb (48 pb)
- V7: 4 pb, 2 aum, 9 pb, 2 aum, 11 pb, 2 aum, 9 pb, 2 aum, 7 pb (56 pb)
- V8: 5 pb, 2 aum, 11 pb, 2 aum, 13 pb, 2 aum, 11 pb, 2 aum, 8 pb (64 pb)
- V9: 6 pb, 2 aum, 13 pb, 2 aum, 15 pb, 2 aum, 13 pb, 2 aum, 9 pb (72 pb)
- V10: 7 pb, 2 aum, 15 pb, 2 aum, 17 pb, 2 aum, 15 pb, 2 aum, 10 pb (80 pb)
- V11–V25: punto sobre punto (80 pb)
- V26: 7 pb, 2 dism, 15 pb, 2 dism, 17 pb, 2 dism, 15 pb, 2 dism, 10 pb (72 pb)
- V27: 6 pb, 2 dism, 13 pb, 2 dism, 15 pb, 2 dism, 13 pb, 2 dism, 9 pb (64 pb)
- V28: 5 pb, 2 dism, 11 pb, 2 dism, 13 pb, 2 dism, 11 pb, 2 dism, 8 pb (56 pb)
- V29: 4 pb, 2 dism, 9 pb, 2 dism, 11 pb, 2 dism, 9 pb, 2 dism, 7 pb (48 pb)
- V30: 3 pb, 2 dism, 7 pb, 2 dism, 9 pb, 2 dism, 7 pb, 2 dism, 6 pb (40 pb)
- V31: 2 pb, 2 dism, 5 pb, 2 dism, 7 pb, 2 dism, 5 pb, 2 dism, 5 pb (32 pb)
- V32: 1 pb, 2 dism, 3 pb, 2 dism, 5 pb, 2 dism, 3 pb, 2 dism, 4 pb (24 pb)
- V33: 2 dism, 1 pb, 2 dism, 3 pb, 2 dism, 1 pb, 2 dism, 3 pb (16 pb)
- V34: In BLO: 16 pb
- V35–V39: punto sobre punto (16 pb), close and cut the yarn.
Note: Insert the safety eyes between rounds 18 and 19, leaving 14 stitches between them. After placing, they’ll be 10 stitches apart, leaving room for the nose embroidered between rounds 20 and 21 (3 stitches wide).
Stuffing tip: The head shape depends on how you stuff it. Over-stuffing makes it oval; the right amount with corners shaped gives you the cube look. The bottom tube will be tucked into the head to fit the body.
How to Crochet the Ears and Bow
Ears (Make 2)
- V1: 6 pb in AM
- V2: (1 aum, 1 pb) x3
- V3: (2 pb, 1 aum) x3
- V4: (1 aum, 3 pb) x3
- V5: (4 pb, 1 aum) x3
- V6–V7: punto sobre punto
- Leave a long tail for sewing. Sew between V5 and V12 of the head.
Bow
- 9 cad, start from the second chain.
- V1: 1 aum, 6 pb, 4 pbj, 6 pb, 1 aum (22 pb)
- V2: 2 aum, 6 pb, 4 aum, 6 pb, 2 aum (30 pb)
- V3–V4: punto sobre punto (30 pb)
- Leave a long tail to form the bow.
Bow Center
- V1: 8 pb in AM
- V2: 8 aum
- Assemble the bow using the photos as a guide.
How to Crochet the Arms
Make 2. Work with white yarn.
- V1: 5 pb in AM
- V2: 5 aum
- V3: 10 pb
- V4: 5 pb, 1 bobble stitch of 4 dc, 4 pb
- V5–V7: punto sobre punto 10 pb
Change to pink yarn.
- V8: In BLO: 10 pd
- V9: In BLO: 10 pb
- V10–V13: punto sobre punto 10 pb
Note: The arms are crocheted before the body and set aside until the joining round. Do not stuff the arms.
How to Crochet the Legs and Body
First Leg
- V1: 8 pb in AM
- V2: 8 aum
- V3: (1 pb, 1 aum) x8
- V4–V7: punto sobre punto
Change to pink yarn.
- V8: In BLO: 24 pd
- V9: In BLO: 24 pb
Second Leg and Body
Crochet the second leg the same as the first through V9, but do not cut the yarn. Join the legs.
- V10: 24 pb (leg 1) + 24 pb (leg 2) = 48 pb
- V11–V14: punto sobre punto 48 pb
- V15: (6 pb, 1 dism) x6 = 42 pb
- V16: punto sobre punto
Change to pink yarn.
- V17: In BLO: 42 pb
- V18: (1 dism, 5 pb) x6 = 36 pb
- V19–V20: punto sobre punto
Joining the Arms
- V21: 7 pb, 5 pb (arm + body), 12 pb, 5 pb (arm + body), 7 pb (36 pb)
- V22: 7 pb, 5 pb (arm), 12 pb, 5 pb (arm), 7 pb (36 pb)
- V23: (1 pb, 1 dism) x12 = 24 pb
- V24: In BLO: 2 pb, 10 dism, 2 pb = 14 pb
- V25: punto sobre punto 14 pb
- V26–V32: punto sobre punto (14 pb)
- V33: 7 dism, close with yarn needle.
How to Crochet the Overalls
Back Detail
In FLO, work 16 pb.
- V1–V3: 16 pb, 1 cad, turn
- V4: 16 pb, close and hide the yarn.
Front Detail
In FLO, work 15 pb.
- V1–V3: 15 pb, 1 cad, turn
Right Strap (without cutting the yarn)
- V4: 5 pb
- V5: 1 dism, 3 pb = 4 pb
- V6: 4 pb
- V7: 1 dism, 2 pb = 3 pb
- V8–V15: 3 pb
Left Strap
- V1: 5 pb
- V2: 3 pb, 1 dism = 4 pb
- V3: 4 pb
- V4: 2 pb, 1 dism = 3 pb
- V5–V12: 3 pb
Add small buttons or beads for the overall details.
How to Crochet the Graduation Outfit
Toga
- 31 cad, start from the second chain. At the end of each row, 1 cad and turn.
- V1: 5 pb, 1 aumT, 4 pb, 1 aumT, 8 pb, 1 aumT, 4 pb, 1 aumT, 5 pb (38 pb)
- V2: 6 pb, 1 aumT, 6 pb, 1 aumT, 10 pb, 1 aumT, 6 pb, 1 aumT, 6 pb (46 pb)
- V3: 7 pb, 1 aumT, 8 pb, 1 aumT, 12 pb, 1 aumT, 8 pb, 1 aumT, 7 pb (54 pb)
- V4: 8 pb, 1 aumT, 10 pb, 1 aumT, 14 pb, 1 aumT, 10 pb, 1 aumT, 8 pb (62 pb)
- V5: 10 pb, 3 cad, skip 12 pb, 18 pb, 3 cad, skip 12 pb, 10 pb (44 sts including chains)
- V6: punto sobre punto including chains (44 pb)
- V7: punto sobre punto (44 pb)
- V8: 1 pb, (6 pb, 1 aum) x6, 1 pb (50 pb)
- V9: punto sobre punto (50 pb)
- V10: 1 pb, (1 aum, 7 pb) x6, 1 pb (56 pb)
- V11–V14: punto sobre punto (56 pb)
- V15: punto sobre punto (56 pb), without cutting the yarn, work pb all around the edge.
Sleeves
Work pb in the sleeve opening.
- V1: 16 pb
- V2–V5: punto sobre punto 16 pb
Fold the collar slightly to form a triangular shirt collar. Choose any color for the toga.
Sash
- 70 cad, start from the third chain.
- V1: 68 pb
- V2–V3: punto sobre punto 68 pb
Embroider “EGRESADITA” or a name on the sash. Place it diagonally and add velcro at the ends if you want it removable.
Mortarboard Cap
Square Top (Make 2 pieces, or use a piece of cardboard between them for firmness):
- 17 cad, start from the second chain. At the end of each row, 1 cad and turn.
- V1–V15: punto sobre punto (16 pb)
- Make a second piece without cutting the yarn, then join both pieces with pb around the edge.
Circular Part:
- V1: 8 pb in AM
- V2: 8 aum (16 pb)
- V3: (1 pb, 1 aum) x8 (24 pb)
- V4: (1 pb, 1 aum, 1 pb) x8 (32 pb)
- V5: In BLO: 32 pb
- V6–V9: punto sobre punto (32 pb)
Join the square top to the circular part with a seam or fabric glue.
Tassel: Make a thin mini pompom and leave long strands to attach at the center and hang around the cap. Place the cap between the ears. If you want it removable, use a pin; otherwise sew or glue it in place.
Putting Your Crochet Pattern Hello Kitty Together
- Stuff the head carefully, shaping the corners to keep the cube form.
- Insert the safety eyes between rounds 18 and 19.
- Embroider the nose in yellow between rounds 20 and 21, 3 stitches wide.
- Embroider the whiskers on each side of the face.
- Sew the ears between V5 and V12 of the head.
- Assemble the bow and sew it to the head near one ear.
- Stuff the body and attach the arms at the joining round.
- Tuck the neck tube into the head opening and sew securely.
- Add the overalls or graduation outfit.
- Add blush to the cheeks.
- Add buttons or beads to the overall straps.
Tips for a Neater Crochet Pattern Hello Kitty
- Use a stitch marker. The pattern has many rounds, and it’s easy to lose your place.
- Count your stitches. The cube shape depends on accurate counts.
- Stuff carefully. The head needs firm stuffing with shaped corners for the Funko look.
- Keep tension tight. Loose stitches make the color changes look messy.
- Use the X-shaped single crochet. It creates a neater, denser fabric.
- Pin before sewing. Placement matters for the ears, bow, and arms.
- Embroider the face before attaching the bow. It’s easier to reach the front.
- Use fabric glue for the cap. It holds the square top to the circular part securely.
- Try different overall colors. The pattern works with any color you like.
- Make the graduation outfit removable. Velcro or pins let you change her look.
FAQ About the Crochet Pattern Hello Kitty
What skill level is this crochet pattern Hello Kitty?
It’s intermediate. You need to know magic ring, single crochet, increase, decrease, color changes, and basic embroidery.
How big is the finished Hello Kitty?
About 12 cm tall when using the recommended yarn and hooks.
What yarn is used for this crochet pattern Hello Kitty?
The pattern uses 100% cotton yarn (4 strands), such as Quesitos de la Colonial, in white, pink, and yellow for the nose.
What size safety eyes do I need?
12 mm safety eyes (1 pair).
Can I make Hello Kitty without the graduation outfit?
Yes. The pattern includes instructions for pink overalls and a separate graduation outfit. You can make one or both.
How do I make the cube-shaped head?
The head is crocheted in a rectangular shape with specific increases and decreases to form a cube. The stuffing technique is key — shape the corners as you stuff.
Where do I place the eyes?
Insert the safety eyes between rounds 18 and 19, leaving 14 stitches between them. After placement, they’ll be 10 stitches apart.
Your Next Stitch
This crochet pattern Hello Kitty is one of those projects that brings a little joy to every stitch. Whether you make her in pink overalls or a full graduation outfit, you’ll end up with a 12 cm friend who looks like she stepped right out of a collectible box. She’s small enough to display on a shelf, detailed enough to feel rewarding, and cute enough that you’ll want to make more than one.
So gather your cotton yarn, pick your hooks, and start with that first magic ring. If you get stuck on the cube head or the graduation cap, come back to this guide and work through it step by step. And when your Hello Kitty is finished, share it in post a photo, and show off your work. Your next project might be exactly what someone else needs to see.
Happy crocheting!