Crochet Snuggle Dragon Pattern Amigurumi
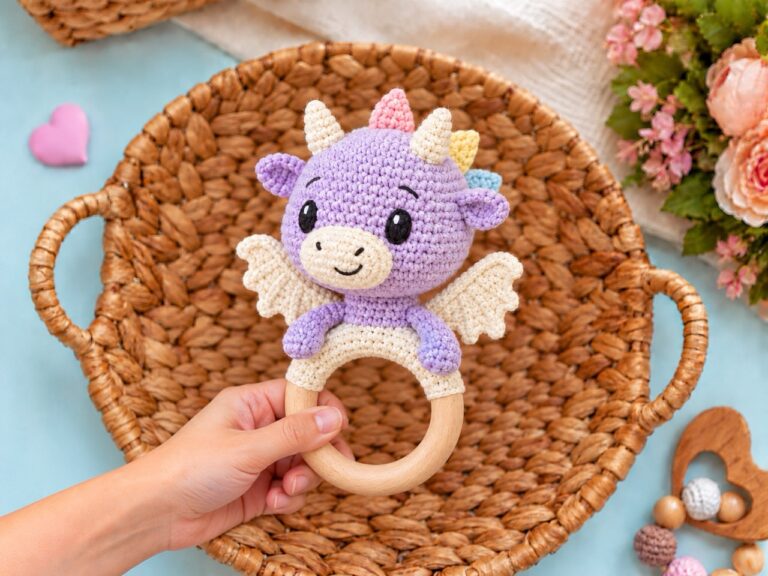
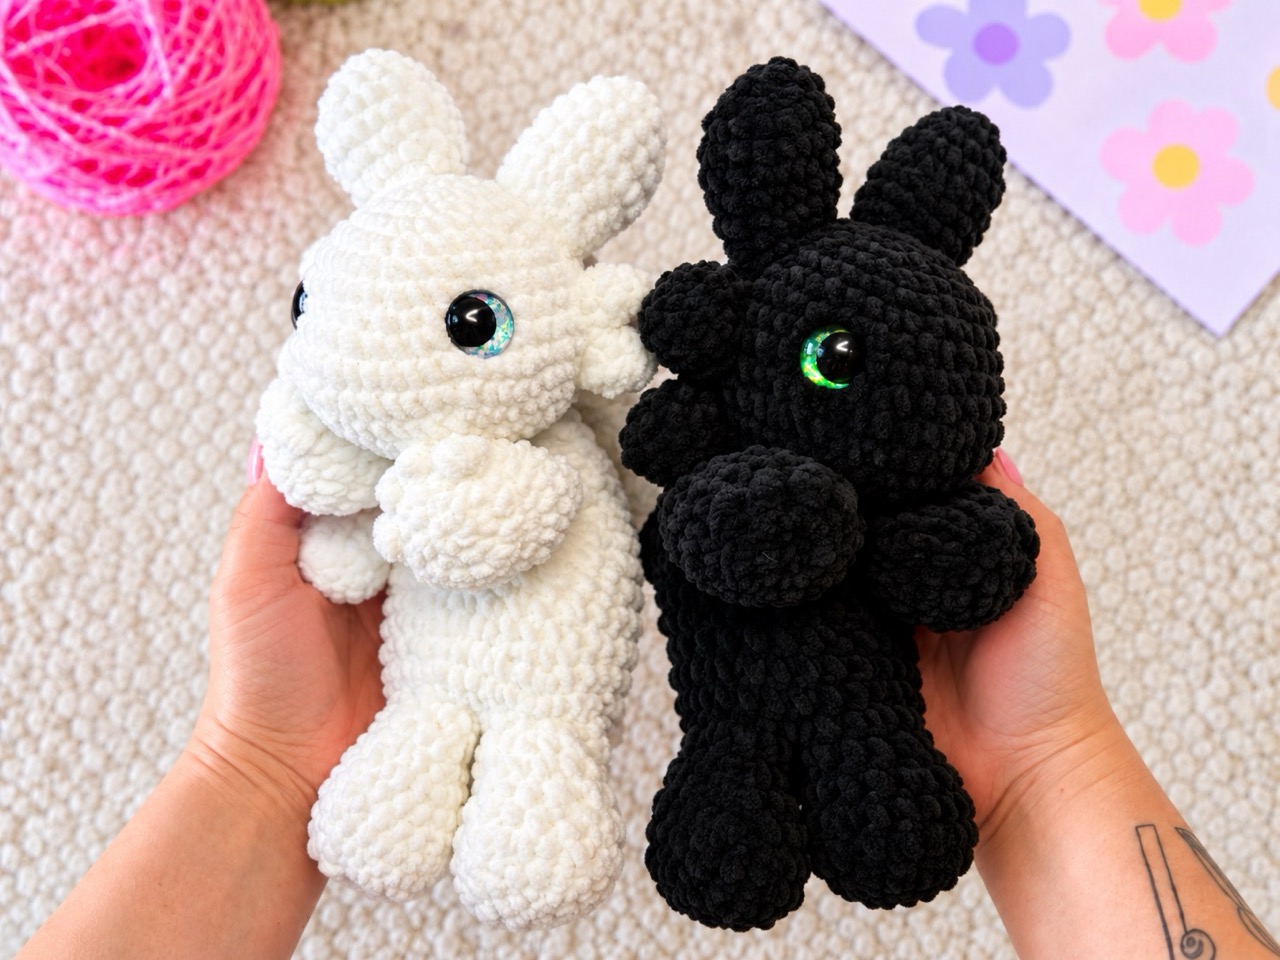
Have you ever wanted to make a dragon so big and soft that it feels like a hug you can carry around? That’s exactly what this crochet dragon pattern delivers. The Long-Tail Snuggle Dragon has a rounded head, a separate oval snout, layered head fins, and three little toes on each paw. Two contrasting wing layers add color and help the wings hold their shape.
Below is a complete guide to the pattern. You’ll find the supplies, terms, step-by-step rounds for the body, head, ears, legs, tail pieces, and wings, plus assembly notes, finishing touches, tips, and answers to common questions.
finished length: approximately 70–85 cm from nose to tail tip, measured with the dragon gently laid out.
Jump to a Section
- Why This Crochet Dragon Pattern Stands Out
- What You Need Before You Start
- Stitch Terms and Techniques
- How to Crochet the Dragon Tail and Body
- How to Crochet the Dragon Head
- How to Crochet the Snout
- How to Crochet the Ears and Head Fins
- How to Crochet the Legs and Paws
- How to Crochet the Wings
- How to Crochet the Tail Fins
- Putting Your Snuggle Dragon Together
- Finishing Touches for Your Crochet Dragon
- Tips for a Neater Snuggle Dragon
- FAQ About the Crochet Dragon Pattern
- Your Next Stitch
Why This Crochet Dragon Pattern Stands Out
This dragon combines a substantial plush body with a flexible tail and lightly stuffed limbs.
- length: 70–85 cm, including the tail.
- Skill level: Confident beginner to intermediate. The main challenges are working oval foundations, making bobbles, joining wing layers, and assembling the pieces.
- Construction: The tail and body form one continuous piece. The remaining parts are sewn on.
- Face: A broad head, separate snout, embroidered nostrils, and optional stitched smile.
- Paws: Four soft legs, each with three bobble toes.
- Wings: Two flat layers joined with a pointed border.
- Head details: Large and medium fins, with an optional smaller pair.
- Pose: A relaxed dragon that rests on its tummy.
Most of the toy uses single crochet. Half double crochet and double crochet appear in the wing edging, while partially completed double crochet stitches form the toes.
What You Need Before You Start
Yarn and Hook
Use super bulky blanket or chenille yarn in matching thicknesses.
- Main color A: Allow approximately 600–750 g for the body, head, snout, limbs, head fins, outer wings, and tail fins.
- Contrast color B: Allow approximately 50–100 g for the inner wings and optional details.
- Optional third color: A small amount for contrasting toes or one tail fin.
- Main hook: 5.5 mm, adjusted as needed to produce a firm fabric that contains the stuffing.
- Sewing yarn: Strong cotton yarn in a matching color, especially if your chenille yarn sheds or breaks when pulled through seams.
- Embroidery yarn: Small amounts for the nostrils, mouth, and optional embroidered eyes.
These quantities are planning allowances rather than measured consumption from a finished sample. Check the weight and length of your chosen skeins before buying yarn.
Other Supplies
- Two 25–30 mm safety eyes, or yarn for embroidered eyes.
- Polyester fiberfill.
- Yarn needle.
- Scissors.
- Stitch markers.
- Pins or removable markers for assembly.
Gauge and Finished Size
A useful starting target is approximately:
10 sc and 11 rounds = 10 cm, measured over single crochet fabric without stretching.
This is a design target, not a measured sample gauge. Yarn thickness, stitch tension, and stuffing will affect the final dimensions.
Use a hook that gives you a soft but closed fabric. If stuffing shows through the stitches, try a smaller hook before continuing.
Stitch Terms and Techniques
This pattern uses US crochet terminology.
- MR: Magic ring.
- ch: Chain.
- sc: Single crochet.
- hdc: Half double crochet.
- dc: Double crochet.
- sl st: Slip stitch.
- inc: Work 2 sc into the same stitch.
- dec: Decrease 2 stitches into 1.
- BLO: Back loop only.
- st/sts: Stitch/stitches.
- R: Round.
- [instructions] × number: Repeat the bracketed instructions the stated number of times.
- (number): Finished stitch count.
General Pattern Notes
- Work the three-dimensional pieces in continuous rounds.
- Do not join rounds unless instructed.
- Mark the first stitch of each round.
- Work the wing panels and tail fins in rows.
- Turning chains do not count as stitches.
- Begin numbering again for each new piece.
- Unless otherwise stated, work through both loops.
- Leave long sewing tails on pieces that will be attached later.
Starting Without a Magic Ring
For pieces beginning with a magic ring, you may instead ch 2 and work the specified number of sc into the second chain from the hook.
The head and snout use oval chain foundations, so follow their separate starting instructions.
Invisible Decrease
Insert the hook under the front loop of the next stitch, then under the front loop of the following stitch. Yarn over and pull through both front loops. Yarn over and pull through the remaining two loops.
Use this decrease for the pieces worked in rounds.
For the flat tail fins, use an ordinary sc2tog through both loops of the two stitches.
Three-Double-Crochet Bobble
Work all three partial double crochet stitches into the same stitch:
- Yarn over, insert the hook, yarn over, and pull up a loop.
- Yarn over and pull through two loops.
- Repeat Steps 1–2 twice more in the same stitch.
- With four loops on the hook, yarn over and pull through all four.
The completed bobble counts as one stitch. Push it outward to form a toe.
Picot
Ch 3, then sl st into the third chain from the hook.
The picots form the points along the wing edges.
Changing Colors
Complete the final pull-through of the last stitch with the new color. Secure the yarn ends on the inside without pulling the fabric out of shape.
How to Crochet the Dragon Tail and Body
Use main color A.
Begin at the tail tip and work toward the neck. The tail and torso are one continuous piece.
- R1: 6 sc in a MR. (6)
- R2–5: Sc around. (6) — 4 rounds.
- R6: [2 sc, inc] × 2. (8)
- R7–11: Sc around. (8) — 5 rounds.
- R12: [3 sc, inc] × 2. (10)
- R13–17: Sc around. (10) — 5 rounds.
- R18: [4 sc, inc] × 2. (12)
- R19–23: Sc around. (12) — 5 rounds.
- R24: [3 sc, inc] × 3. (15)
- R25–29: Sc around. (15) — 5 rounds.
- R30: [4 sc, inc] × 3. (18)
- R31–34: Sc around. (18) — 4 rounds.
- R35: [5 sc, inc] × 3. (21)
- R36–39: Sc around. (21) — 4 rounds.
- R40: [6 sc, inc] × 3. (24)
- R41–44: Sc around. (24) — 4 rounds.
- R45: [3 sc, inc] × 6. (30)
- R46: Sc around. (30)
- R47: [4 sc, inc] × 6. (36)
- R48: Sc around. (36)
- R49: [5 sc, inc] × 6. (42)
- R50–65: Sc around. (42) — 16 rounds.
- R66: [5 sc, dec] × 6. (36)
- R67: Sc around. (36)
- R68: [4 sc, dec] × 6. (30)
- R69: Sc around. (30)
- R70: [3 sc, dec] × 6. (24)
- R71–73: Sc around. (24) — 3 rounds.
- R74: [2 sc, dec] × 6. (18)
- R75–76: Sc around. (18) — 2 rounds.
Fasten off, leaving a long sewing tail. Leave the 18-stitch neck opening open.
Stuffing the Tail and Body
Add stuffing progressively while the opening is accessible.
- Keep approximately R1–30 empty or very lightly stuffed.
- Add small amounts to the wider tail, preserving its flexibility.
- Stuff the torso evenly, keeping it soft enough to drape.
- Give the neck enough support to carry the head without making it rigid.
Roll and gently squeeze the body between your hands to distribute the filling.
How to Crochet the Dragon Head
Use main color A.
The head begins with an oval at the crown. Work around both sides of the foundation chain.
Ch 8.
- R1: Starting in the second chain from the hook, 6 sc, 3 sc in the last chain. Continue along the opposite side of the foundation: 5 sc, inc in the last chain. (16)
- R2: Inc, 5 sc, 3 inc, 5 sc, 2 inc. (22)
- R3: Sc, inc, 5 sc, [sc, inc] × 3, 5 sc, [sc, inc] × 2. (28)
- R4: 2 sc, inc, 5 sc, [2 sc, inc] × 3, 5 sc, [2 sc, inc] × 2. (34)
- R5: 3 sc, inc, 5 sc, [3 sc, inc] × 3, 5 sc, [3 sc, inc] × 2. (40)
- R6: 4 sc, inc, 5 sc, [4 sc, inc] × 3, 5 sc, [4 sc, inc] × 2. (46)
- R7: 5 sc, inc, 5 sc, [5 sc, inc] × 3, 5 sc, [5 sc, inc] × 2. (52)
- R8–13: Sc around. (52) — 6 rounds.
- R14: [11 sc, dec] × 4. (48)
- R15: [6 sc, dec] × 6. (42)
- R16: [5 sc, dec] × 6. (36)
Position the Eyes
Pause here if using safety eyes.
Hold the head so the foundation chain runs horizontally from left to right. Choose one broad side as the face.
Position the eyes:
- Between head R9 and R10.
- Approximately 10 stitch spaces apart, measured from eye center to eye center.
- Symmetrically on either side of the face.
Temporarily add some stuffing to check the expression. Adjust the placement, then secure the eye backings while you can still reach inside.
Continue:
- R17: [4 sc, dec] × 6. (30)
- R18: [3 sc, dec] × 6. (24)
- R19: [2 sc, dec] × 6. (18)
- R20: [sc, dec] × 6. (12)
Finish stuffing. Shape the head into a broad, rounded oval.
- R21: Dec × 6. (6)
Fasten off. Thread the yarn through the front loops of the final six stitches, pull closed, and secure the end inside.
The head is fully closed. The open neck will later be sewn onto its underside.
How to Crochet the Snout
Use main color A, or a slightly lighter shade.
Ch 6.
- R1: Starting in the second chain from the hook, 4 sc, 3 sc in the last chain. Along the opposite side: 3 sc, inc in the last chain. (12)
- R2: Inc, 3 sc, 3 inc, 3 sc, 2 inc. (18)
- R3: Sc, inc, 3 sc, [sc, inc] × 3, 3 sc, [sc, inc] × 2. (24)
- R4: 2 sc, inc, 3 sc, [2 sc, inc] × 3, 3 sc, [2 sc, inc] × 2. (30)
- R5–6: Sc around. (30) — 2 rounds.
Fasten off, leaving a long sewing tail. Leave the base open.
Embroider two short nostril marks on the upper front of the snout, approximately around snout R2–3. Keep them evenly spaced.
Lightly stuff the snout when attaching it to the head.
How to Crochet the Ears and Head Fins
The layered fins give the dragon its large-eared silhouette. Make the large and medium pairs, then add the small pair if desired.
Use main color A. Leave all fins unstuffed.
Large Head Fins — Make 2
- R1: 5 sc in a MR. (5)
- R2: Inc × 5. (10)
- R3: [Sc, inc] × 5. (15)
- R4: [4 sc, inc] × 3. (18)
- R5–7: Sc around. (18) — 3 rounds.
- R8: [4 sc, dec] × 3. (15)
- R9: [3 sc, dec] × 3. (12)
- R10: Sc around. (12)
Flatten the opening. Work 6 sc through both layers, pairing one stitch from each side for every sc.
Fasten off, leaving a long sewing tail.
Medium Head Fins — Make 2
- R1: 4 sc in a MR. (4)
- R2: [Sc, inc] × 2. (6)
- R3: [2 sc, inc] × 2. (8)
- R4: [3 sc, inc] × 2. (10)
- R5–6: Sc around. (10) — 2 rounds.
Flatten the opening and work 5 sc through both layers.
Fasten off, leaving a long sewing tail.
Small Head Fins — Optional, Make 2
- R1: 4 sc in a MR. (4)
- R2: [Sc, inc] × 2. (6)
- R3–4: Sc around. (6) — 2 rounds.
Flatten the opening and work 3 sc through both layers.
Fasten off, leaving a long sewing tail.
How to Crochet the Legs and Paws
Make 4 using main color A.
Begin at the paw and work upward.
- R1: 6 sc in a MR. (6)
- R2: Inc × 6. (12)
- R3: [Sc, inc] × 6. (18)
- R4: [2 sc, inc] × 6. (24)
- R5: [3 sc, inc] × 6. (30)
- R6: Working BLO, sc around. (30)
- R7: Working through both loops, 9 sc, bobble, 4 sc, bobble, 4 sc, bobble, 10 sc. (30)
- R8: Sc around. (30)
Push the three bobbles outward to form the toes.
- R9: 7 sc, dec × 8, 7 sc. (22)
- R10: 5 sc, dec × 6, 5 sc. (16)
- R11–13: Sc around. (16) — 3 rounds.
Add stuffing to the paw. Use only a small amount above it so the leg remains flexible.
- R14: [2 sc, dec] × 4. (12)
- R15–16: Sc around. (12) — 2 rounds.
Keep the last two rounds unstuffed.
Flatten the opening with the toes facing upward and forward. If necessary, work a few positioning slip stitches to move the working yarn to a side edge before closing.
Work 6 sc through both layers. Fasten off, leaving a long sewing tail.
Optional Contrasting Toes
To make a bobble in another color:
- Change to the toe color during the final pull-through of the preceding sc.
- Work the three partial double crochet stitches in the toe color.
- Close the bobble with main color A.
- Continue the following sc in A.
Each bobble still counts as one stitch.
How to Crochet the Wings
Each wing uses two flat panels joined around the edge.
Make 4 panels total:
- 2 in main color A.
- 2 in contrast color B.
For solid-color wings, make all four panels in A.
Wing Panels
Ch 5.
- Row 1: Starting in the second chain from the hook, 4 sc. (4)
- Row 2: Ch 1, turn. Inc, 2 sc, inc. (6)
- Row 3: Ch 1, turn. Inc, 4 sc, inc. (8)
- Row 4: Ch 1, turn. Inc, 6 sc, inc. (10)
- Row 5: Ch 1, turn. Inc, 8 sc, inc. (12)
- Row 6: Ch 1, turn. Inc, 10 sc, inc. (14)
- Row 7: Ch 1, turn. Inc, 12 sc, inc. (16)
- Row 8: Ch 1, turn. Inc, 14 sc, inc. (18)
- Row 9: Ch 1, turn. Sc across. (18)
Fasten off and secure the ends.
The four-stitch foundation edge is the narrow wing root. The 18-stitch final row is the broad outer edge.
Join the Wing Layers
Place one A panel and one B panel together with their wrong sides facing inward. Match the corners and row ends.
Do not stuff.
Join main color A at a corner of the narrow root. Work through both layers throughout the border.
- Root edge: Ch 1, then work 4 sc across the foundation edge.
- First side: Work 9 sc along the side, placing one sc into each paired row end.
- Outer edge: Work the following sequence three times across the 18 stitches:Sl st in the next stitch, sc in the next stitch, hdc in the next stitch, (dc, picot, dc) in the next stitch, hdc in the next stitch, sc in the next stitch.
- Second side: Work 9 sc down the remaining side, one sc into each paired row end.
- Sl st into the first border sc.
Each outer-edge repeat uses six panel stitches. Work no additional corner stitches.
The completed border contains 43 stitches, plus three picots. This count excludes the starting chain, final joining slip stitch, and stitches used to form the picots.
Fasten off, leaving a long sewing tail at the wing root.
Repeat for the second wing.
Optional Wing Veins
With matching or contrasting yarn, embroider short stitches from the narrow root toward each of the three outer points.
Keep the embroidery relaxed so it does not gather the wing.
How to Crochet the Tail Fins
Make 2.
Use main color A for both, or make one in a contrasting color.
Before starting, leave a 30 cm yarn tail for attaching the narrow base.
Ch 3.
- Row 1: Starting in the second chain from the hook, 2 sc. (2)
- Row 2: Ch 1, turn. Inc × 2. (4)
- Row 3: Ch 1, turn. Inc, 2 sc, inc. (6)
- Row 4: Ch 1, turn. Inc, 4 sc, inc. (8)
- Rows 5–6: Ch 1, turn. Sc across. (8) — 2 rows.
- Row 7: Ch 1, turn. Dec, 4 sc, dec. (6)
- Row 8: Ch 1, turn. Dec, 2 sc, dec. (4)
- Row 9: Ch 1, turn. Dec × 2. (2)
- Row 10: Ch 1, turn. Dec. (1)
Fasten off and weave in the finishing end at the pointed tip.
Keep the starting yarn tail available for sewing the two-stitch foundation edge to the dragon.
Leave the fins flat and unstuffed.
Putting Your Snuggle Dragon Together
Pin all major pieces in place before sewing. Lay the dragon on its tummy and check it from the front, sides, and above.
Use the round numbers as placement guides, adjusting slightly if your tension changes the proportions.
1. Attach the Snout
Position the snout horizontally beneath the eyes.
- Center it on the face.
- Place its upper edge just below the eyes.
- Aim for a footprint covering approximately head R11–15.
- Keep the nostrils on the upper front.
Sew around the open base. Add a small amount of stuffing before closing the final gap.
The snout should remain softly rounded.
2. Attach the Large Head Fins
Pin one large fin to each upper side of the head.
- Place the bases approximately across head R4–7.
- Viewed from the front, leave roughly four stitches between the inner edges.
- Angle the tips backward toward the body.
Sew the flattened bases securely to the head.
3. Add the Medium and Small Fins
Position each medium fin slightly behind and below a large fin, around the rear half of head R8–10.
If using the small fins, place them farther behind and below the medium pair, around head R11–12.
Check both sides before sewing. The fins should form a layered arrangement.
4. Join the Head to the Body
Use removable markers to identify the top of the back and the underside of the body. The round-start marker does not automatically indicate either position.
Place the open neck against the underside and rear half of the head, approximately over head R15–19.
- Point the snout away from the tail.
- Spread the neck’s 18-stitch rim evenly against the head surface.
- Sew each neck stitch securely to the head.
- Add any final neck stuffing through the remaining gap.
- Close the seam and reinforce it if needed.
The head is already closed, so this is a surface attachment rather than a stitch-for-stitch join between two openings.
5. Attach the Front Legs
Place the front legs on the lower sides of the torso, approximately around body R65–68.
The paws should rest beside or slightly ahead of the chest.
Keep the bobble toes facing toward the head and slightly upward. Sew the flattened tops of the legs firmly to the body.
6. Attach the Hind Legs
Position the hind legs around body R51–54, on the lower sides of the torso.
Space them slightly farther apart than the front pair. Check that the dragon rests comfortably on its tummy with all four paws visible.
Sew the flattened leg tops in place.
7. Attach the Wings
Place the wings on the upper back, just behind the head.
- Position each narrow root lengthwise along approximately body R66–70.
- Leave about four body stitches between the root seams, measured across the back.
- Keep the contrast surfaces visible.
- Angle the broad ends outward and slightly toward the tail.
Sew only the narrow roots to the body. Leave the remaining wing edges free.
8. Attach the Tail Fins
Place one fin on each side of the narrow tail around body R7–10.
Use the long starting tails to sew the two-stitch foundation edges to the tail.
Angle the fins outward and slightly toward the tail tip. If a fin twists, tack the first one or two side rows near its base to the tail as well.
Leave the wider sections and pointed ends free.
Finishing Touches for Your Crochet Dragon
Embroider the Mouth
Add a small curved mouth beneath the snout using short stitches in a contrasting color.
Keep the stitches loose enough to preserve the snout’s shape.
Embroidered Eye Option
If you are using embroidered eyes, follow the same placement guide:
- Between head R9 and R10.
- Approximately 10 stitch spaces apart, center to center.
Build each oval with short overlapping stitches. Add a darker center and a small white highlight if desired.
Final Shaping
- Push all three toes on each paw outward.
- Smooth the stuffing in the head and torso.
- Arrange the head fins so both sides balance.
- Spread the wings gently.
- Curve the soft tail beside the body.
- Check every attachment seam.
- Secure and conceal all yarn ends.
- Remove every pin and temporary marker.
Tips for a Neater Snuggle Dragon
- Mark important rounds. Removable markers at body R51, R65, and R70 make assembly easier.
- Stuff the tail gradually. Small amounts are easier to distribute through its narrow sections.
- Keep paired pieces consistent. Make matching fins, wings, and legs with the same hook and tension.
- Check the oval foundations carefully. The head and snout require stitches on both sides of the starting chain.
- Use strong yarn for seams. Matching cotton can be easier to sew with than chenille.
- Check paw direction before closing. The bobbles establish the top and front of each foot.
- Keep the upper legs soft. Leaving their final rounds empty helps the paws rest naturally.
- Match wing layers before edging. Align all nine row ends on both sides.
- Pin the face first. Eye spacing and snout placement strongly affect the expression.
- Support the neck without overfilling it. The head needs a stable attachment while the body stays flexible.
FAQ About the Crochet Dragon Pattern
What skill level is this crochet dragon pattern?
It suits crocheters who are comfortable with basic amigurumi. You will use single crochet shaping, oval foundations, bobbles, simple row work, and sewing.
The layered wings and assembly require more attention than the long stretches of body rounds.
How big is the finished dragon?
The intended length is approximately 70–85 cm from nose to tail tip, with the dragon gently laid out.
Yarn, gauge, stuffing, and head placement will affect the finished measurement.
What yarn should I use?
Use super bulky blanket or chenille yarn that produces a closed fabric with your chosen hook.
Allow approximately 600–750 g of the main color and 50–100 g of the contrast color.
What hook size does the pattern use?
Start with a 5.5 mm hook.
Adjust the hook if necessary to keep the stitches close enough to contain the stuffing. The suggested gauge is approximately 10 sc and 11 rounds per 10 cm.
What size eyes does the dragon need?
The suggested size is 25–30 mm, depending on the expression you prefer and the size of your finished head.
You can also embroider the eyes.
Where do I place the eyes?
Place them between head R9 and R10, approximately 10 stitch spaces apart from center to center.
Install safety-eye backings after R16, while the head opening is still accessible.
Are the body and tail separate?
No. They are crocheted together from the tail tip to the neck in 76 continuous rounds.
Do I stuff the wings and head fins?
No. Leave the head fins, wing layers, and tail fins unstuffed.
The paws receive light stuffing, with less filling toward the upper legs.
Can the dragon stand upright?
The design is intended to rest on its tummy or drape over an arm. Its flexible limbs are positioned for a relaxed pose.
Can I change the colors?
Yes. Use the same yarn thickness throughout.
You can make solid-color wings, contrasting inner wings, different-colored toes, or one contrasting tail fin.
How does the head attach to the body?
The head is fully closed. Sew the body’s open 18-stitch neck rim onto the underside and rear half of the head, approximately around head R15–19.
Why are there four wing panels?
Each completed wing contains two panels. Joining an outer panel to an inner panel adds thickness and encloses their wrong sides.
Four panels make two finished wings.
Your Next Stitch
Choose your main and wing colors, then begin with the six-stitch tail tip. Keep your stuffing light through the narrow tail and take time to pin the face, fins, and wings before sewing—their placement gives your dragon its expression and relaxed pose.
Happy crocheting!