Crochet Pattern Mini Cow 4 Adorable Amigurumi Cows
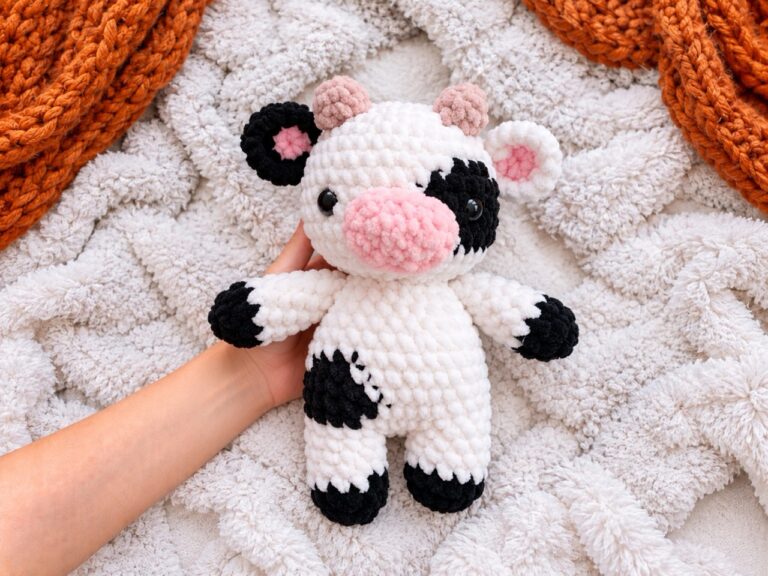
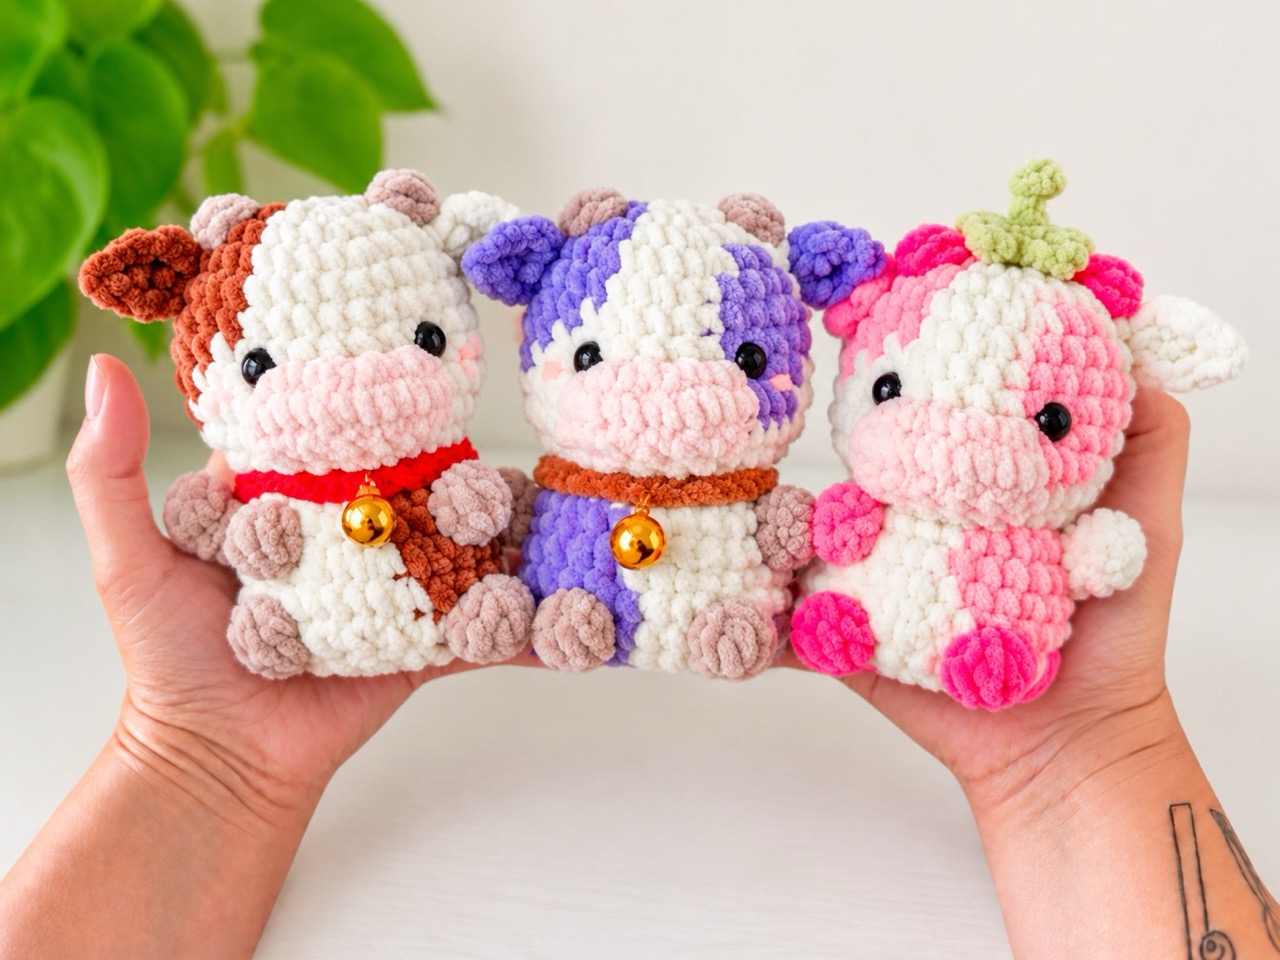
There’s something about a tiny handmade cow that makes you smile. Maybe it’s the little snout, the floppy ears, or the way they look like they just wandered in from a sunny meadow. This crochet pattern mini cow gives you four different versions of the same adorable design: a classic White & Brown cow, a shaggy Scottish Highland cow, a Purple cow with a brown collar, and a Strawberry cow with a leafy top. Each one is designed for super bulky chenille yarn and a 4.0 mm hook. Finished height is approximately 5 inches (13 cm), depending on your tension, yarn, and stuffing.
Below is a complete guide to the Mini Cow pattern. You’ll find the materials, abbreviations, step-by-step instructions for all four versions, plus assembly notes, tips, and answers to common questions.
Jump to a Section
- Why This Crochet Pattern Mini Cow Stands Out
- Gather these materials:
- Abbreviations and Special Stitches
- How to Crochet the Mini Cow
- Head and Body
- Make one oval muzzle in light peach.
- Make two front legs.
- Make two back feet.
- Make two ears.
- Make two horns in the horn color.
- Make the spots for the white-and-brown, purple, and strawberry cows.
- Make one tail in the main color.
- For the Highland version, make a separate fringe in brown.
- For the strawberry version, make one leaf crown in light green.
- Make a fitted collar.
- Assemble and finish the cow in this order:
- Tips for a Neater Crochet Pattern Mini Cow
- FAQ About the Crochet Pattern Mini Cow
- Your Next Stitch
Why This Crochet Pattern Mini Cow Stands Out
Finished size and yarn. Aim for approximately 5 inches (13 cm) tall, measured from the bottom of the seated cow to the horn tips. Use super bulky chenille yarn, approximately 100 g/120 m per skein, with a 4.0 mm hook. Make a firm fabric without gaps that show stuffing. The final size will vary with your yarn, tension, and stuffing.
Gather these materials:
- One 100 g skein of main-color chenille yarn per cow; the exact amount depends on your tension.
- Small amounts of chenille yarn in the contrast, muzzle, and hoof colors.
- Small amounts of yarn for the collar and other decorations.
- Black embroidery thread for the eyes and nostrils.
- Pink embroidery thread for the cheeks and inner ears.
- Fiberfill, stitch marker, tapestry needle, scissors, and pins.
Use this color guide. All four versions have a light-peach muzzle.
| Version | Main color | Spots and contrast ear | Hooves and horns | Collar |
|---|---|---|---|---|
| White and brown | Cream | Brown | Beige | Red |
| Highland | Warm brown | No spots; both ears brown | Beige | Dark brown |
| Purple | Cream | Lavender or purple | Beige | Purple |
| Strawberry | Cream | Light pink | Rose pink | Light green |
The Highland cow also needs brown yarn for its fringe. The strawberry cow needs light-green yarn for its leaf crown.
Abbreviations and Special Stitches
- ch — chain stitch
- sc — single crochet stitch
- dc — double crochet stitch
- hdc — half double crochet stitch
- trc — triple crochet stitch
- slst — slip stitch
- sk — skip
- inc — increase (2 sc into the same stitch)
- dec — invisible decrease (2 sc together in 1 stitch)
- trx — triple stitch (3 “x” stitches into the same stitch)
- Rnd/s — round/rounds
- st/sts — stitch/stitches
- BLO — back loop only
- FLO — front loop only
- TLO — third loop only
- […]…x — work instructions between brackets and repeat as many times as indicated
- {…+…} — work instructions between curly brackets into the same stitch
- […] — total number of stitches at the end of a round/row
- Bobble dc x — a bobble stitch made of “x” double crochet stitches
Work in continuous rounds unless instructed otherwise. Move your marker to the first stitch of each round. Instructions in brackets are repeated the stated number of times. Numbers in parentheses give the completed stitch count. Turning chains do not count as stitches.
Starting Ring
Instead of a magic ring, this pattern uses a starting ring: Ch 2, sc 8 in 2nd ch from hook. You can substitute a magic ring with sc 8 if you prefer.
Invisible Fasten Off
Skip next stitch. Insert the needle into both loops of next stitch, pull yarn through. Insert the needle through the back loop of the starting stitch and tighten just enough so the join looks like a regular stitch.
Color Change
For color changes, finish the last stitch before the change by drawing the new color through its final two loops.
Bobble dc 5
Yarn over, insert hook into the indicated stitch, yarn over and draw through. You now have three loops. Yarn over and pull through the first two loops. Repeat four more times in the same stitch. You should have 6 loops on the hook. Yarn over and draw through all 6 loops.
Bobble dc 5 with a New Color
Make the color change in the stitch before starting the bobble. Do the bobble stitch. Take the old color to make the last yarn over and draw through all loops. Continue with the old color.
How to Crochet the Mini Cow
Head and Body
Begin with the body and continue directly into the head. Use the main color.
- R1: 6 sc in MR. (6)
- R2: Inc in every stitch. (12)
- R3: [1 sc, inc] × 6. (18)
- R4: [2 sc, inc] × 6. (24)
- R5: [3 sc, inc] × 6. (30)
- R6: 30 sc. (30)
- R7: 30 sc. (30)
- R8: 30 sc. (30)
- R9: [3 sc, dec] × 6. (24)
- R10: 24 sc. (24)
- R11: [2 sc, dec] × 6. (18)
- R12: 18 sc. (18)
- R13: [1 sc, dec] × 6. (12)
Stuff the body through the neck opening. Keep the bottom broad and rounded, and avoid stretching the stitches. Do not fasten off.
Continue upward to form the head:
- R14: [1 sc, inc] × 6. (18)
- R15: [2 sc, inc] × 6. (24)
- R16: [3 sc, inc] × 6. (30)
- R17: [4 sc, inc] × 6. (36)
- R18: 36 sc. (36)
- R19: 36 sc. (36)
- R20: 36 sc. (36)
- R21: 36 sc. (36)
- R22: 36 sc. (36)
- R23: [4 sc, dec] × 6. (30)
- R24: [3 sc, dec] × 6. (24)
- R25: [2 sc, dec] × 6. (18)
Stuff the head, adding small amounts at a time. Put enough filling through the neck to support the head without making the neck bulge.
- R26: [1 sc, dec] × 6. (12)
- R27: Dec × 6. (6)
Fasten off, leaving a tail. Thread it through the front loops of the six remaining stitches, draw closed, and bury the end.
Make one oval muzzle in light peach.
Ch 5.
- R1: Starting in the second chain from the hook, work 1 sc in each of the next 3 chains, then 3 sc in the last chain. Continue along the underside of the foundation chain: 1 sc in each of the next 2 chains, then 2 sc in the final chain. (10)
- R2: Inc, 2 sc, inc in each of the next 3 stitches, 2 sc, inc in each of the final 2 stitches. (16)
- R3: 16 sc. (16)
Fasten off with a long sewing tail. Leave the opening unclosed.
Before attaching it, embroider two short vertical nostrils on the outward-facing surface, approximately four stitches apart.
Pin the muzzle to the front of the head, centered across approximately R17–R20. Sew around its open edge, adding a small pinch of stuffing before finishing the seam. Keep it shallow and oval.
Make two front legs.
Start in the hoof color.
- R1: 6 sc in MR. (6)
- R2: [1 sc, inc] × 3. (9)
- R3: Working in BLO, 9 sc. (9)
Change to the main color.
- R4: 9 sc. (9)
- R5: [1 sc, dec] × 3. (6)
- R6: 6 sc. (6)
- R7: 6 sc. (6)
Put a tiny amount of stuffing into the hoof only. Leave the upper leg soft.
Flatten the opening and work 3 sc through both layers, closing it. Fasten off with a sewing tail.
For a cloven-hoof detail, embroider one short vertical line down the center front of each hoof using a slightly darker thread.
Make two back feet.
Start in the hoof color.
- R1: 6 sc in MR. (6)
- R2: Inc in every stitch. (12)
- R3: Working in BLO, 12 sc. (12)
- R4: 12 sc. (12)
Change to the main color.
- R5: [1 sc, dec] × 4. (8)
- R6: 8 sc. (8)
- R7: 8 sc. (8)
Lightly stuff the rounded hoof, keeping the opening relatively flat.
Flatten the opening and work 4 sc through both layers. Fasten off with a sewing tail.
Add a short embroidered line to the center front of each hoof.
Make two ears.
For the spotted cows, make one in the main color and one in the spot color. Make both Highland ears brown.
- R1: 4 sc in MR. (4)
- R2: Inc in every stitch. (8)
- R3: [1 sc, inc] × 4. (12)
- R4: 12 sc. (12)
- R5: [1 sc, dec] × 4. (8)
Do not stuff.
Flatten the opening and work 4 sc through both layers. Fasten off, leaving a sewing tail.
Embroider two or three small pink stitches along the center of the front surface. Pinch the two ends of the closed edge together and secure with a few stitches to cup the ear.
Make two horns in the horn color.
- R1: 4 sc in MR. (4)
- R2: [1 sc, inc] × 2. (6)
- R3: 6 sc. (6)
- R4: [2 sc, inc] × 2. (8)
Fasten off with a sewing tail. Leave the base open. These small horns can remain unstuffed; use the blunt end of your needle to shape their tips.
Make the spots for the white-and-brown, purple, and strawberry cows.
Use the contrast color. Omit them for the Highland cow.
For one oval spot, ch 5 and work R1 and R2 of the muzzle instructions. Finish after R2 with 16 stitches. This piece stays flat and receives no stuffing.
For each of two round spots:
- R1: 6 sc in MR. (6)
- R2: Inc in every stitch. (12)
Fasten off each spot with a sewing tail.
Pin the oval spot vertically on one side of the face, approximately across R18–R23. Position it so the eye can sit near its inner edge. Place one round spot on the side of the body and the other toward the back. Sew around their edges with small stitches without gathering the fabric.
Make one tail in the main color.
Ch 7.
Starting in the second chain from the hook, work 1 sl st in each of the remaining 6 chains. Fasten off, leaving a sewing tail at the base.
For the tuft, use the spot color, or a darker brown for the Highland cow:
- Work 4 sc in MR.
- Join with a sl st to the first sc.
- Pull the ring closed and fasten off.
Fold this tiny disc around the free tip of the tail and sew it in place. Bend the tail into a gentle curve when attaching it.
For the Highland version, make a separate fringe in brown.
Ch 6.
Row 1: Starting in the second chain from the hook, work 5 sc. (5)
Ch 1 and turn. Work one strand into each of the five stitches as follows:
- Sl st in the first stitch, ch 5, then work 4 sl st back along the chain, beginning in the second chain from the hook. Sl st into the same foundation stitch.
- Sl st in the next stitch, ch 6, work 5 sl st back along the chain, then sl st into the same foundation stitch.
- Sl st in the next stitch, ch 7, work 6 sl st back along the chain, then sl st into the same foundation stitch.
- Sl st in the next stitch, ch 6, work 5 sl st back along the chain, then sl st into the same foundation stitch.
- Sl st in the final stitch, ch 5, work 4 sl st back along the chain, then sl st into the same foundation stitch.
Fasten off with a sewing tail. You now have five strands attached to a short foundation strip.
Sew the foundation strip across the upper forehead, around R24–R25, between the horns. Arrange the longest strand between the eyes and sweep the neighboring strands slightly outward.
For the strawberry version, make one leaf crown in light green.
Make an MR, leaving it loose while working.
Repeat the following sequence five times into the ring:
- Ch 4.
- Sl st in the second chain from the hook.
- Sc in the next chain.
- Hdc in the final chain.
- Sl st into the MR.
This makes five pointed leaves.
Before tightening the ring, make the central stem:
- Ch 3.
- Sl st in the second chain from the hook.
- Sl st in the remaining chain.
- Sl st into the MR.
Pull the ring closed and fasten off with a sewing tail.
Sew the center of the crown to the top of the head between the horns. Tack down each leaf near its base, leaving the tips free. Add three or four tiny cream seed stitches to each pink body spot if desired.
Make a fitted collar.
Use the collar color listed in the table.
Ch 18 as a starting length. Wrap the chain around the neck at R13 before fastening off. Add or remove chains until the ends meet without compressing the neck.
Fasten off, sew the ends together around the neck, and tack the collar to the cow at the front, back, and both sides.
For an optional soft bell-shaped tab, use a small amount of golden-yellow yarn:
- Ch 3.
- Row 1: Starting in the second chain from the hook, 2 sc. (2)
- Row 2: Ch 1, turn, 2 sc. (2)
Fasten off. Sew the upper edge beneath the front of the collar. A short dark stitch along the lower edge suggests the bottom of a bell.
Assemble and finish the cow in this order:
- Choose the front. Set the body upright and pin the muzzle in position. Check that it sits centrally above the neck.
- Attach the face spot. For a spotted cow, sew the oval patch beside the muzzle before embroidering the eyes.
- Attach the muzzle. Sew around its opening, adding just enough stuffing to lift it away from the face.
- Embroider the eyes. Place their centers between R20 and R21, approximately eight stitch spaces apart. Make each eye about 4–5 mm across. Adjust the placement while the muzzle is pinned so both eyes remain clearly visible above its upper corners.
- Add cheeks. Work two tiny pink stitches just below and slightly outside each eye.
- Attach the back feet. Sew their flattened ends to the lower front sides of the body, around R3–R5. Point the rounded hooves forward and slightly outward. Pin both feet first and check that they support the seated position.
- Attach the front legs. Sew their closed edges to the upper sides of the body around R10–R11. Let the hooves hang forward, above and slightly inside the back feet.
- Attach the horns. Sew their open bases onto the upper left and right sides of the head around R24–R26. Angle the tips slightly outward.
- Attach the ears. Sew each pinched base just below and outside its horn, around R22–R24. Let the ears extend sideways.
- Attach the body spots. Keep the front legs and feet clear of the patch edges.
- Attach the tail. Sew its base to the center back around R5–R6. Tack the curve lightly to the body if you want it to stay curled upward.
- Add the version-specific decoration. Attach the Highland fringe or strawberry leaf crown.
- Fit the collar. Secure it around the neck and add the optional soft tab.
- Finish the seams. Secure and bury every yarn end, then gently shape the muzzle, head, and feet with your fingers.
Tips for a Neater Crochet Pattern Mini Cow
- Use a stitch marker. Continuous rounds make it easy to lose your place.
- Count your stitches. The color changes and bobble stitches depend on accurate counts.
- Stuff as you go. It’s easier to shape the head and body before closing.
- Use cotton yarn for sewing. Chenille frays easily, so a finer cotton yarn makes assembly much easier.
- Choose the right needle. A needle with a large hole minimizes yarn damage.
- Work carefully with chenille. If you need to undo a round, do it slowly.
- Match your hook to your tension. If you crochet tightly, use a 5.0 mm hook instead of 4.0 mm.
- Pin the ears before sewing. Place them just below the horns and check their position from the front and both sides.
- Embroider the cheeks before attaching the collar. It’s easier to see the face without the collar in the way.
- Try different color combinations. The pattern works with any colors you like.
FAQ About the Crochet Pattern Mini Cow
What skill level is this crochet pattern mini cow?
It’s intermediate beginner. You need to know magic ring (or starting ring), single crochet, increase, decrease, color changes, and bobble stitches.
How big is the finished mini cow?
About 5 inches tall when using super bulky chenille yarn and a 4.0 mm hook.
What yarn is used for this crochet pattern mini cow?
The pattern uses super bulky chenille yarn (100g/120m), such as Katia Bambi, Himalaya Dolphin Baby, Premier Parfait Chunky, or Hobbii Honey Bunny.
Does this version need safety eyes?
This version uses embroidered eyes. Follow the eye placement in the assembly section.
How many versions are included in this pattern?
Four: White & Brown, Scottish, Purple, and Strawberry.
Can I make this cow without safety eyes?
Yes. Embroidered eyes are included in the assembly instructions for this version.
Where do I place the eyes?
Embroider the eye centers between R20 and R21, approximately eight stitch spaces apart. Make each eye about 4–5 mm across, adjusting the placement while the muzzle is pinned.
How do I make the ears?
Make two ears separately, close and pinch their bases, then sew them just below and outside the horns around R22–R24. The ear instructions explain the color options.
How do I make the Scottish cow’s hair?
Make the separate brown fringe with five strands on a short foundation strip. Sew the strip across the upper forehead around R24–R25, between the horns, as described in the Highland fringe section.
Your Next Stitch
This crochet pattern mini cow is one of those projects that brings a little joy to every stitch. Whether you make the classic White & Brown cow, the shaggy Scottish Highland, the Purple cow with its brown collar, or the Strawberry cow with its leafy top, you’ll end up with a 5-inch friend who looks like it just wandered in from a sunny meadow.
So gather your chenille yarn, pick your hook, and start with that first chain. If you get stuck on the bobble stitches or the hair, come back to this guide and work through it step by step. And when your mini cows are finished, share them, post a photo, and show off your work. Your next project might be exactly what someone else needs to see.
Happy crocheting!