Crochet Bag Pattern Trendy Hobo Bag Lacing Loop Stitch
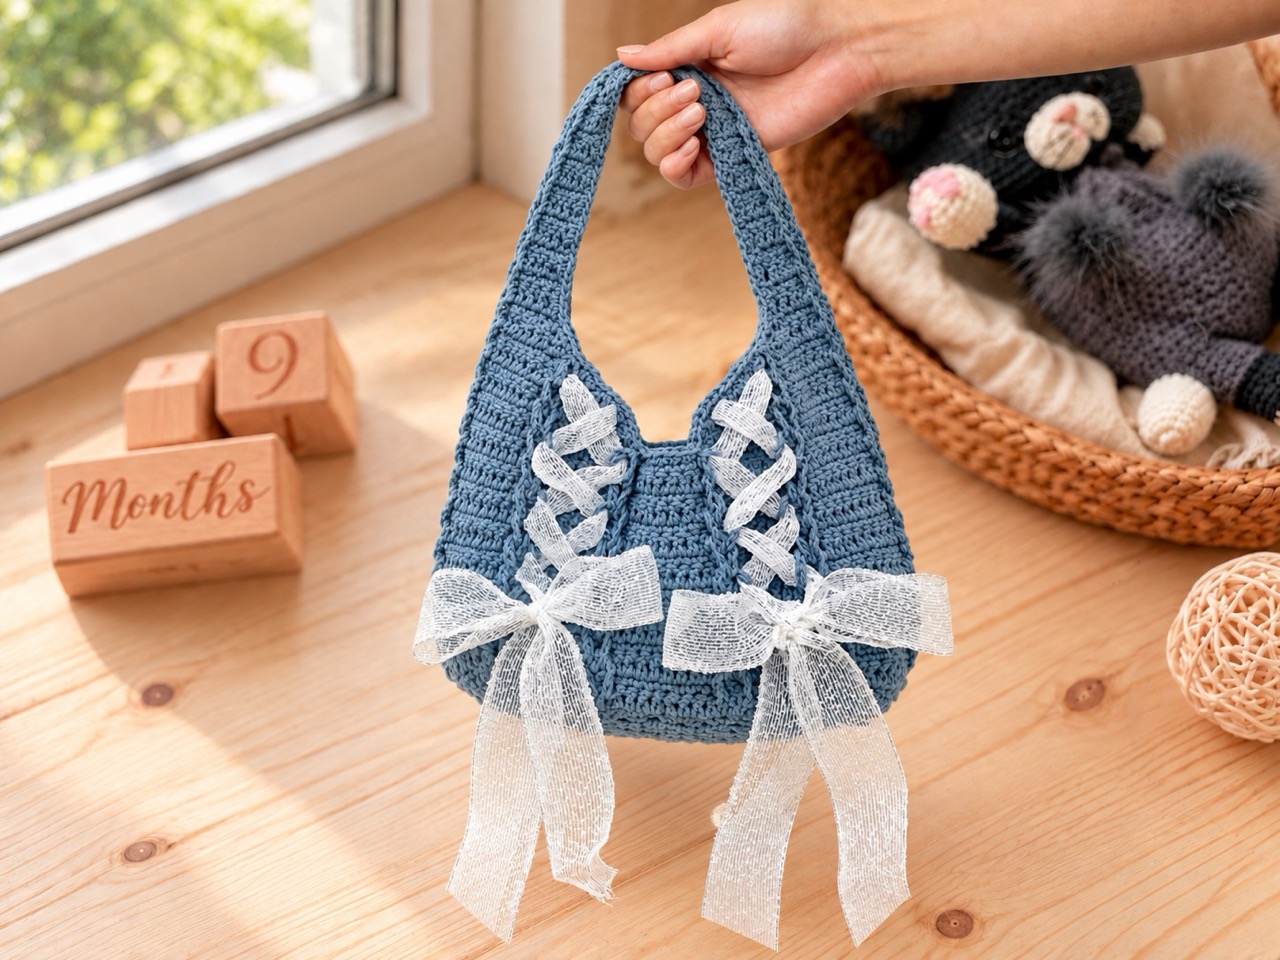
There’s something undeniably charming about a handmade bag that looks like it came straight from a boutique. This crochet Willow & Ribbon Lattice Market Bag pattern offers a hobo-style shoulder bag with a relaxed, slouchy shape, a sturdy integrated handle, and a distinctive loop texture that creates a woven lattice effect. The finishing touch? Beautiful ribbon laced through the front and tied into soft bows. Whether you make it in cotton, acrylic, or a blend, this bag is the kind of accessory that elevates any outfit — from a summer dress to your favorite jeans.
Below is a complete guide to the Willow & Ribbon Lattice Market Bag pattern. You’ll find the materials, abbreviations, step-by-step instructions for the bottom, body, handle, assembly, and ribbon, plus tips, finishing notes, and answers to common questions.
Jump to a Section
- Why This Crochet Lattice Market Bag Stands Out
- What You Need Before You Start
- Abbreviations and Special Stitches
- How to Crochet the Bottom Panel
- How to Crochet the Main Bag Body
- How to Crochet the Tapered Handles
- Putting Your Lattice Market Bag Together
- How to Add the Ribbon Weave
- Tips for a Neater Crochet Market Bag
- FAQ About the Willow & Ribbon Lattice Market Bag Pattern
- Your Next Stitch
Why This Crochet Lattice Market Bag Stands Out
Plenty of crochet bag patterns exist, but this one has a few qualities that make it especially appealing.
- Skill level: Intermediate.
- Finished size: Approximately 41 cm long x 29 cm wide (excluding handle drop).
- Yarn: Medium weight (size 4) cotton yarn — approx. 230–250 meters (150 g). The sample was made using 100% worsted cotton yarn.
- Hook: 4.5 mm (US 7) crochet hook.
- Construction: Worked bottom-up in three main sections — rectangular bottom panel, continuous loop-worked body, and tapered dual handles.
- Details: The body features a Jacob’s Ladder loop stitch variation that forms vertical channels for lacing ribbon through the front.
- Versatility: Easy to adjust in size or height by altering row repeats, and infinitely customizable depending on your choice of satin, velvet, or organza ribbon.
If you’ve been searching for a crochet lattice market bag pattern that feels approachable and looks boutique-worthy, this one is a wonderful choice.
What You Need Before You Start
Gather your supplies first. The pattern uses medium weight cotton yarn and a 4.5 mm hook.
Yarn and Hook
- Yarn: Medium weight (size 4) worsted 100% cotton yarn (230–250 m / 150 g).
- Hook: 4.5 mm (US 7) crochet hook.
- Ribbon: 1.5 cm – 2.5 cm wide satin, organza, lace, or grosgrain ribbon (approx. 3–4 meters total).
- Stitch markers.
- Tapestry needle.
- Scissors.
Notes on Gauge and Size
- Gauge: 16 dc x 8 rows = 10 x 10 cm (4″ x 4″) in double crochet.
- Keep your stitches firm to minimize gaps and reduce stretch.
- Finished Size: ~41 cm long x 29 cm wide flat body. The bottom base panel measures approximately 8 cm x 21.5 cm.
General Notes
- Pattern starts with the rectangular base, moving directly into the body and handles.
- Work with the right side (RS) facing out.
- Ch 1 does not count as a stitch unless noted. Ch 3 counts as 1 dc.
- Weave in loose ends continuously as you work.
Abbreviations and Special Stitches
- Ch — chain
- Sc — single crochet stitch
- Dc — double crochet stitch
- Sc3tog — single crochet 3 together
- Dc3tog — double crochet 3 together
- Sl st — slip stitch
- St(s) — stitch(es)
- TO — turn over work
- RS / WS — right side / wrong side
The Loop Stitch (Jacob’s Ladder Variation)
This stitch works in groups of 9 stitches to generate vertical loop columns:
- Work Sc 4.
- Ch 10, then insert hook into the top loops of the 4th (last worked) sc st, yarn over, and pull through to lock the loop.
- Continue across: Sc 9, working another Ch 10 loop on the 9th stitch.
- On subsequent Double Crochet (Dc) rows: When reaching a stitch beneath a Ch 10 loop, yarn over, insert hook from back to front through the center of the loop and into the stitch below, completing a standard DC while capturing the loop.
Sc3tog (Single Crochet 3 Together)
Insert hook into first stitch, yarn over and pull up a loop. Insert hook into second stitch, yarn over and pull up a loop. Insert hook into third stitch, yarn over and pull up a loop. Yarn over and pull through all 4 loops on hook.
Dc3tog (Double Crochet 3 Together)
Yarn over, insert hook into first stitch, yarn over and pull up a loop, yarn over and pull through 2 loops. Repeat in the next two stitches (4 loops on hook). Yarn over and pull through all 4 loops.
How to Crochet the Bottom Panel
- Foundation row: Chain 15.
- Row 1 (RS): Dc in 4th ch from hook (first 3 chains count as 1 dc), dc 11 across. Ch 3, TO.
<13 sts> - Row 2: Dc 12 across (counting turning chain as 1st st). Ch 3, TO.
<13 sts> - Rows 3–16: Repeat Row 2 for 14 more rows (16 rows total). Fasten off.
<13 sts per row> - Size: About 8 cm x 21.5 cm.
How to Crochet the Main Bag Body
The body is worked across the long edge of the bottom panel, creating 10 loop columns.
Row 1 (RS)
Insert hook at top left corner of the bottom panel’s long edge. Ch 1, sc in same st.
- Sc 4.
- *Ch 10, sl st into last sc, sc 9*; repeat from * to * 8 more times (9 loop groups made).
- Ch 10, sl st into last sc, sc 4, sl st to end, ch 3, TO.
<90 sts total, 10 loop columns>
Row 2 (WS)
- Dc 89 across row (ensuring each Ch 10 loop is captured in its designated st column). Sl st to 3rd ch of turning chain, ch 1, TO.
<90 sts>
Rows 3–16
- Repeat Rows 1–2 for 7 additional times (8 loop-set row pairs total).
- Ensure loop chains line up vertically in neat, straight columns.
Row 17
Repeat Row 1 layout, but omit the Ch 10 loops across the 4 central columns to leave a smooth area for handle transition.
- Instruction: Sc 5, Ch 10 loop, sc 27, Ch 10 loop, [sc 9, Ch 10 loop] 2 times, sc 18, Ch 10 loop, sc 9, Ch 10 loop, sc 4. Sl st, fasten off.
<Approx. 18 29 body cm flat size x>
How to Crochet the Tapered Handles
Make 2 identical handle sections (Front and Back).
With RS facing, count to the 3rd st of the loop column from the left, turn work to WS, attach yarn.
- Row 1: Ch 3, dc 36 across, ch 1, TO.
<37 sts> - Row 2: Sc3tog, sc 7, Ch 10 loop, sc 9, Ch 10 loop, sc 6, sc3tog, ch 3, TO.
<33 sts> - Row 3: Dc3tog, dc 27, dc3tog, ch 1, TO.
<29 sts> - Row 4: Sc3tog, sc 3, Ch 10 loop, sc 9, Ch 10 loop, sc 2, sc3tog, ch 3, TO.
<25 sts> - Row 5: Dc3tog, dc 19, dc3tog, ch 1, TO.
<21 sts> - Row 6: Sc3tog, sc 8, Ch 10 loop, sc 7, sc3tog, ch 3, TO.
<17 sts> - Row 7: Dc3tog, dc 11, dc3tog, ch 1, TO.
<13 sts> - Row 8: Sc3tog, sc 4, Ch 10 loop, sc 3, sc3tog, ch 3, TO.
<9 sts> - Row 9: Dc 8 across, ch 1, TO.
<9 sts> - Row 10: Sc 5, Ch 10 loop, sc 4, ch 3, TO.
<9 sts> - Rows 11–24: Repeat Rows 9–10 seven more times (or until desired handle drop height is reached).
- Row 25: Dc 8, ch 3, TO.
<9 sts> - Row 26: Dc 8. Fasten off leaving a 30 cm tail.
Repeat handle construction for the opposite side of the bag body.
Putting Your Lattice Market Bag Together
- Interlock Chain Loops (Jacob’s Ladder Assembly):
- Starting at the bottom row of each vertical column, take the first Ch 10 loop, pull the second loop up through it from behind, then pull the third loop through the second.
- Continue interlocking the loops upward like a chain until you reach the top row of the handle. Secure the top loop temporarily with a stitch marker.
- Connecting Handles:
- Align the two finished handle extensions with WS facing up.
- Using a tapestry needle or sl st seam through back loops, join Row 26 of both handles together securely.
- Include the final top loops of the chained ladders into the handle join to lock the vertical chains permanently in place.
- Edging Border:
- Do not cut yarn after joining handle tops. Ch 1, work a continuous round of single crochet evenly down the side of the handle, around the armhole opening, up the opposite handle side, and across the top rim.
- Repeat for the opposite side handle rim to give the bag a clean, finished border. Fasten off and weave in all ends.
How to Add the Ribbon Weave
Weaving ribbons into the vertical loop columns adds structure and custom vintage flair.
- Select Ribbon: Choose a 1.5 cm to 2.5 cm wide satin, grosgrain, organza, or lace ribbon.
- Lacing Method:
- Attach a safety pin or tapestry needle to a length of ribbon (~75 cm per column).
- Thread the ribbon vertically up through the interlocked Jacob’s Ladder loop openings from bottom to top.
- Alternatively, weave the ribbon in a criss-cross corset pattern across adjacent loop columns.
- Securing:
- Tie a delicate bow at the bottom base of each column, or knot neatly on the inside rim of the bag.
- Trim ribbon ends on a diagonal and lightly seal with a flame or fray check.
Tips for a Neater Crochet Market Bag
- Check your gauge. Meeting gauge ensures the bag lands precisely around 41 cm x 29 cm.
- Keep your loop stitches even. Try to keep all loops uniform so the chained ladders lay flat.
- Count your stitches. The decreases on the handles rely on accurate stitch counts.
- Work with the right side out. The tail from the foundation row should face left.
- Weave in ends as you go. It keeps the inside of the bag tidy.
- Add a lining if using soft yarn. It prevents stretching under weight and adds structure.
- Block the bag lightly. A gentle steam helps the loop columns lay straight before lacing ribbon.
FAQ About the Willow & Ribbon Lattice Market Bag Pattern
What skill level is this crochet market bag pattern?
It’s intermediate. You need to know chain, single crochet, double crochet, slip stitch, sc3tog, dc3tog, and chained loop interlocking.
How big is the finished bag?
About 41 cm long x 29 cm wide (flat body, excluding handles). The base measures 8 cm x 21.5 cm.
What yarn is used for this pattern?
Medium weight (size 4) cotton yarn. 100% worsted cotton works best to maintain structure and minimize stretch.
What hook size do I need?
A 4.5 mm (US 7) hook.
How do I make the loop stitch?
Chain 10, then push the hook through the last sc, yarn over, and pull through all loops to form a locked ring. Complete instructions are in the pattern.
How do I attach the ribbon?
Lace the ribbon vertically through the interlocked loop chains and tie bows at the bottom. You can use any ribbon style you like.
Your Next Stitch
This Willow & Ribbon Lattice Market Bag pattern is one of those projects that feels both practical and beautiful. It’s a bag you’ll actually use, and it’s stylish enough to become your go-to accessory. Whether you make it in soft pastels with organza ribbon or deep neutrals with satin, you’ll end up with a handmade bag that looks like it came from a boutique.
So gather your cotton yarn, pick up your 4.5 mm hook, and start with that first chain. If you get stuck on the loop stitch or the assembly, come back to this guide and work through it step by step. And when your market bag is finished, share it, post a photo, and show off your work. Your next project might be exactly what someone else needs to see.
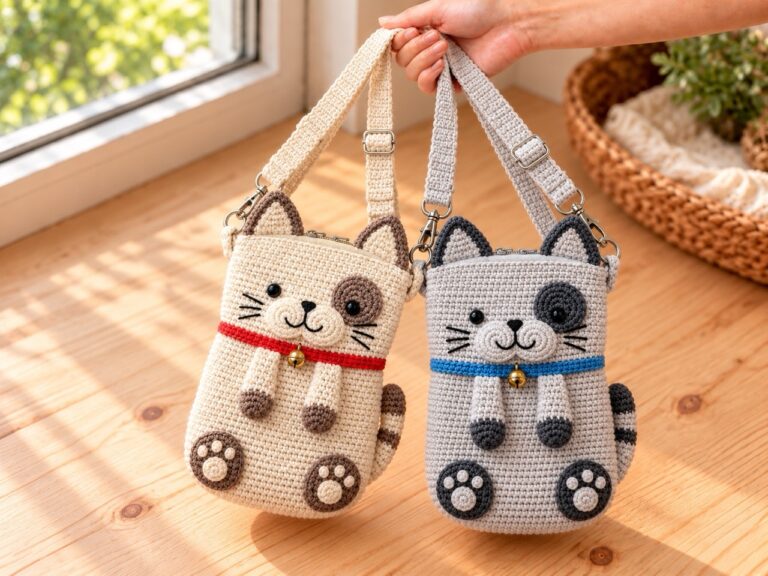
For a smaller crossbody project, explore the crochet cat phone bag pattern. It makes a hollow phone pouch with a zipper, playful cat details, and an adjustable strap.
Happy crocheting!