Free Crochet Bag Pattern Sunburst Raffia Tote & Crossbody
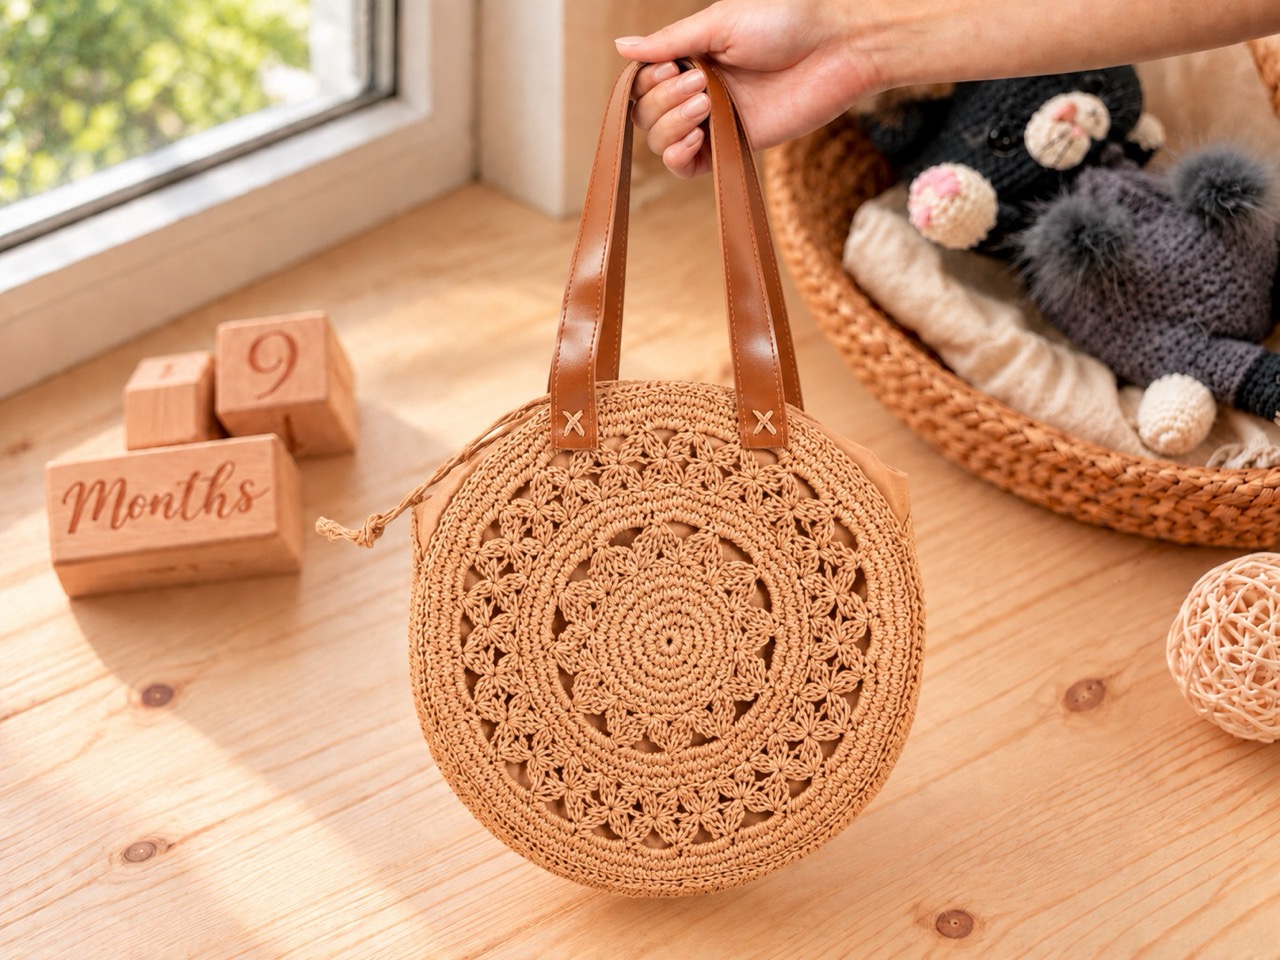
There’s something wonderfully summery about a handmade raffia bag. It’s light, it’s textured, and it carries that effortless market-day charm wherever you go. This crochet raffia bag pattern gives you exactly that: a round bag made from two matching circular sunburst panels, a sturdy oval strap, a fabric lining with a drawstring closure, and a twisted cord to finish it off. The finished bag is about 26–28 cm tall and 28 cm in diameter — big enough to hold your essentials but small enough to carry comfortably. Whether you’re heading to the beach, the farmer’s market, or just want a handmade accessory that stands out, this project delivers.
Below is a complete guide to the Crochet Raffia Bag pattern. You’ll find the materials, abbreviations, step-by-step instructions for the sunburst round panels, the strap, the lining, and the twisted cord, plus assembly notes, tips, and answers to common questions.
Jump to a Section
- Why This Crochet Raffia Bag Pattern Stands Out
- What You Need Before You Start
- Abbreviations and Special Stitches
- How to Crochet the Round Panels
- How to Crochet the Oval Strap
- How to Make the Fabric Lining
- How to Make the Twisted Cord
- Putting Your Crochet Raffia Bag Together
- Tips for a Neater Crochet Raffia Bag
- FAQ About the Crochet Raffia Bag Pattern
- Your Next Stitch
Why This Crochet Raffia Bag Pattern Stands Out
Plenty of crochet bag patterns exist, but this one has a few qualities that make it especially appealing.
- Finished size: Two round panels, each about 27–28 cm in diameter (26–28 cm tall). The strap/base is about 7 x 60 cm.
- Skill level: Intermediate. You need to know magic ring, single crochet, half double crochet, double crochet, puff stitches, crossed double crochets, and working around core strands.
- Yarn: Double-strand, twisted raffia — approximately 120–150 g for the entire bag.
- Hook: 4.0 mm – 4.5 mm hook (or size suitable to meet gauge).
- Construction: Two sunburst circular panels, an oval base/strap, a fabric lining with drawstring channel, and twin twisted cords.
- Details: The bag features eye-catching texture created by 3-hdc Puff Stitches, Crossed Double Crochets, and core-stabilized solid border rounds.
- Technique: Carrying an extra core strand of raffia inside solid rounds gives the bag structure, firm edges, and structural integrity.
- Lining: Hand-sewn interior lining with an integrated drawstring casing and twisted drawstrings.
What You Need Before You Start
Gather your supplies first. The pattern uses raffia and basic crochet tools.
Yarn and Hook
- Raffia: Double, twisted raffia. Approximately 120–150 g total.
- Hook: 4.0 mm – 4.5 mm (or size needed to meet gauge).
- Additional raffia core strands (cut before starting each panel):
- 100 cm for the Round 1 magic ring tail
- 120 cm for core stabilization on Rounds 8–9
- 220 cm for core stabilization on Rounds 15–16
- 250 cm for the twisted cords (makes two 60–62 cm cords)
Tools and Notions
- Fabric for lining: Lightweight canvas or linen.
- Two main body rounded panels (~32 x 30 cm including 1 cm seam allowance)
- One side/bottom gusset strip (10 x 100 cm)
- Sewing machine or needle and thread for the lining.
- Scissors.
- Stitch marker.
- Pins.
- Steam iron / Steamer (essential for blocking raffia).
- Optional: overlock machine for the lining edges.
Gauge
4 sc x 3 rows = 2 x 2 cm (worked in double raffia). Finished panel diameter: ~27–28 cm. Check your gauge before starting.
Abbreviations and Special Stitches
- ch — chain
- sc — single crochet
- hdc — half double crochet
- dc — double crochet
- sl st — slip stitch
- inc — 2 sc in the same stitch
Puff Stitch (3-hdc Puff)
Yarn over, insert hook in st, yarn over, pull up a loop (3 loops on hook). [Yarn over, insert hook in same st, yarn over, pull up a loop] 2 times. You now have 7 loops on hook. Yarn over and draw through all 7 loops. Ch 1 to lock the puff.
Crossed Double Crochet (x-dc)
Skip 1 stitch, double crochet into the next stitch. Double crochet into the skipped stitch behind/over the stitch just made.
How to Crochet the Round Panels
Make 2. Each panel starts with a double magic ring and incorporates core strands for structural stability.
Setting Up
Before starting each panel, cut your extra core strands: 120 cm and 220 cm long. Also leave a 100 cm tail from the double magic ring.
The Technique: Work single crochets as usual, but encase the extra raffia strand inside your stitches. Pull gently on the inner strand periodically to keep the work firm and smooth.
Phase 1: Solid Center Base
- Round 1: Double magic ring with a 100 cm tail. Ch 1, 12 sc into ring. Pull ring tight. (12)
- Round 2: 2 sc in each st around. (24)
- Round 3: [2 sc in next st, sc 1] 12 times. (36)
- Round 4: [2 sc in next st, sc 2] 12 times. (48)
- Round 5: [Sc 3, 2 sc in next st] 12 times. (60)
- Round 6: Sc in each st around. (60)
Phase 2: Sunburst Openwork
- Round 7 (Puff Round): Sl st to next st, ch 1. [Puff stitch in next st, ch 1, skip 1 st] 30 times. Sl st to top of first puff to join. (30 puffs, 30 ch-1 spaces)
- Round 8 (Solid Core Round 1): Add the 120 cm extra strand. Working around the core strand: work 2 sc into each ch-1 space around. (60 sc)
- Round 9 (Solid Core Round 2): Continuing over the core strand: [2 sc in next st, sc 4] 12 times. Fasten off extra strand. (72 sc)
Phase 3: Crossed Stitch Openwork
- Round 10 (Crossed Dc Round): Ch 3 (counts as dc). Skip next st, dc in next st. Dc into skipped st (first x-dc made). Continue making x-dc around. Sl st to top of ch-3 to join. (36 x-dc pairs = 72 sts)
- Round 11: Ch 2, [dc in next 2 sts, ch 1] around. Sl st to join. (36 dc pairs, 36 ch-1 spaces = 108 sts)
- Round 12: Sc in each st and 1 sc in each ch-1 space around. (108 sc)
Phase 4: Outer Decorative Border
- Round 13 (Outer Puff Round): [Puff stitch in next st, ch 2, skip 2 sts] 36 times. Sl st to top of first puff to join. (36 puffs)
- Round 14: Work 3 sc into each ch-2 space around. (108 sc)
- Round 15 (Outer Solid Core Round 1): Add the 220 cm extra strand. Work sc in each st around over the core strand. (108 sc)
- Round 16 (Outer Solid Core Round 2): Continuing over core strand: [2 sc in next st, sc 8] 12 times. (120 sc)
Fasten off and weave in ends.
Note: Steam both round panels thoroughly on the wrong side under a damp press cloth to block them into flat circles measuring 27–28 cm in diameter.
How to Crochet the Oval Strap
The strap forms the side/bottom gusset and shoulder strap (approx. 7 x 60 cm).
- Foundation: Chain 14.
- Round 1: 2 sc in 2nd ch from hook. Sc in next 11 chs. 5 sc in last ch (turning end). Working along opposite side of chain: Sc in next 11 chs, 3 sc in last ch. Join with sl st to first sc. (32)
- Round 2: Ch 1, 2 sc in next 2 sts. Sc in next 11 sts. 2 sc in each of next 5 sts (turning end). Sc in next 11 sts. 2 sc in remaining 3 sts. Join. (42)
- Round 3: Ch 1, [sc 1, 2 sc in next st] twice. Sc in next 11 sts. [Sc 1, 2 sc in next st] 5 times. Sc in next 11 sts. [Sc 1, 2 sc in next st] 3 times. Join. (52)
- Round 4: Ch 1, [sc 2, 2 sc in next st] twice. Sc in next 11 sts. [Sc 2, 2 sc in next st] 5 times. Sc in next 11 sts. [Sc 2, 2 sc in next st] 3 times. Join. (62)
- Rounds 5–6: Sc in each st around with no increases to build depth and structure.
Fasten off, weave in ends, and steam flat.
How to Make the Fabric Lining
The fabric lining keeps the bag functional and structured while housing the drawstring cords.
Cutting Pieces (1 cm seam allowance included)
- Two main panel pieces: 32 cm wide x 30 cm tall with rounded bottom corners and flat top.
- One gusset strip: 10 x 100 cm.
Assembly Steps
- Finish Edges: Overlock or zig-zag stitch all fabric edges to prevent fraying.
- Sew Gusset: Pin and sew the long gusset strip around the curved sides and bottom of the first main body panel (right sides together).
- Attach Second Panel: Sew the second main panel to the opposite side of the gusset strip. Leave the top 8 cm of side seams unstitched to create cord pass-through openings.
- Drawstring Channel: Fold the top raw edge down by 2.5 cm towards the inside (wrong side) to form a channel/casing. Stitch across the fold.
- Pressing: Turn right side out and press all seams with an iron.
How to Make the Twisted Cord
Making a twisted cord is quick and easy. You will make two cords (approx. 60–62 cm each).
- Length required: 250 cm of double-strand raffia per cord.
Method:
- Fold the 250 cm raffia strand in half (125 cm).
- Twist tightly until it starts to kink on itself.
- Fold in half again (62 cm), allowing the cord to twist around itself naturally.
- Tie a secure knot at both ends and trim.
Putting Your Crochet Raffia Bag Together
- Steam Block: Ensure both round sunburst panels and the strap are steam-ironed flat.
- Attach First Panel: Pin the back sunburst panel along one edge of the oval base/strap. Connect using single crochet through both layers with double raffia.
- Attach Second Panel: Repeat the process for the front panel along the opposite edge of the strap.
- Insert Lining: Place the fabric lining inside the assembled raffia body.
- Sew Lining: Hand-sew the top rim of the lining to the inside stitches of the bag using needle and thread, matching centers.
- Thread Drawstrings: Thread the two twisted cords through the top casing of the lining in opposite directions so pulling both ends closes the drawstring bag securely.
Tips for a Neater Crochet Raffia Bag
- Check your gauge. Gauge controls both the final shape and size (26–28 cm height).
- Maintain core strand tension. Gently pull on the carried raffia strand so rounds stay firm and don’t pucker.
- Steam blocking is essential. Raffia responds amazingly to steam; it opens up the puff stitches and flattens panels completely.
- Use stitch markers. Counting puffs and crossed stitches is key to keeping round symmetry.
- Double-strand raffia. Working with a double strand gives the bag great weight, durability, and stitch definition.
FAQ About the Crochet Raffia Bag Pattern
What skill level is this crochet raffia bag pattern?
It’s intermediate. You should be familiar with magic rings, single crochet, double crochet, puff stitches, crossed stitches, and working over core strands.
How big is the finished crochet raffia bag?
The bag stands 26–28 cm tall with circular panels approximately 27–28 cm in diameter. The strap/base measures approximately 7 x 60 cm.
What yarn is used for this crochet raffia bag pattern?
The pattern uses double-strand, twisted raffia (approx. 120–150 g).
What hook size do I need?
Use a 4.0 mm – 4.5 mm hook (or size needed to meet the gauge of 4 sc x 3 rows = 2 x 2 cm).
How much raffia do I need?
About 120–150 g total, including core strands and twisted cords.
Can I make this bag without the lining?
While possible, the fabric lining is highly recommended as it provides structure, prevents sag, and holds the drawstring closure mechanism.
How do I make the twisted cord?
Take 250 cm of double raffia, fold in half, twist tightly, fold in half again, and knot the ends. Make two cords.
Your Next Stitch
This crochet raffia bag pattern is one of those projects that brings a little sunshine to every stitch. It’s light, textured with sunburst puffs, and built to last. Whether you carry it to the beach, the market, or a summer picnic, you’ll have a handmade accessory that turns heads and starts conversations.
So gather your raffia, pick your hook, and start with that first magic ring. If you get stuck on the cluster stitches or the lining, come back to this guide and work through it step by step. And when your bag is finished, share it, post a photo, and show off your work. Your next project might be exactly what someone else needs to see.
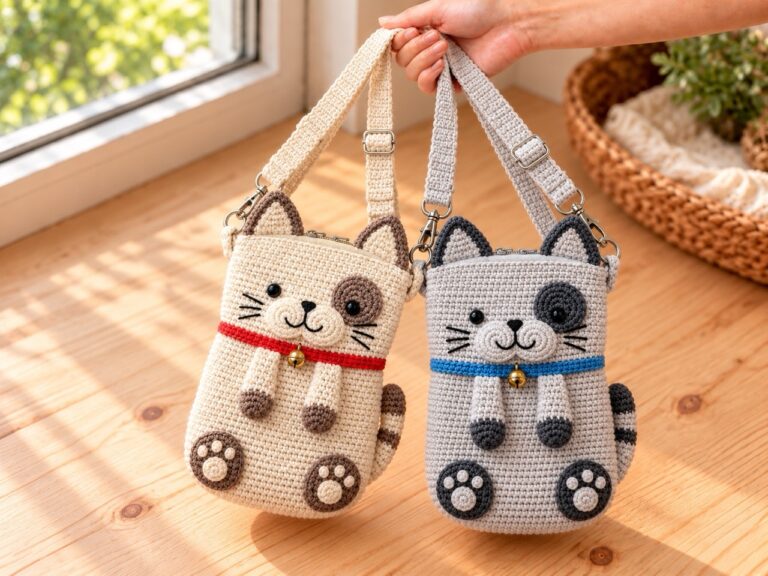
If you would like a compact bag for your phone, see the crochet cat phone bag pattern. Its zippered pouch and adjustable crossbody strap make a different everyday carry project.
Happy crocheting!