Crochet Heart Bag Pattern: Make the Petal Heart Mini Bag
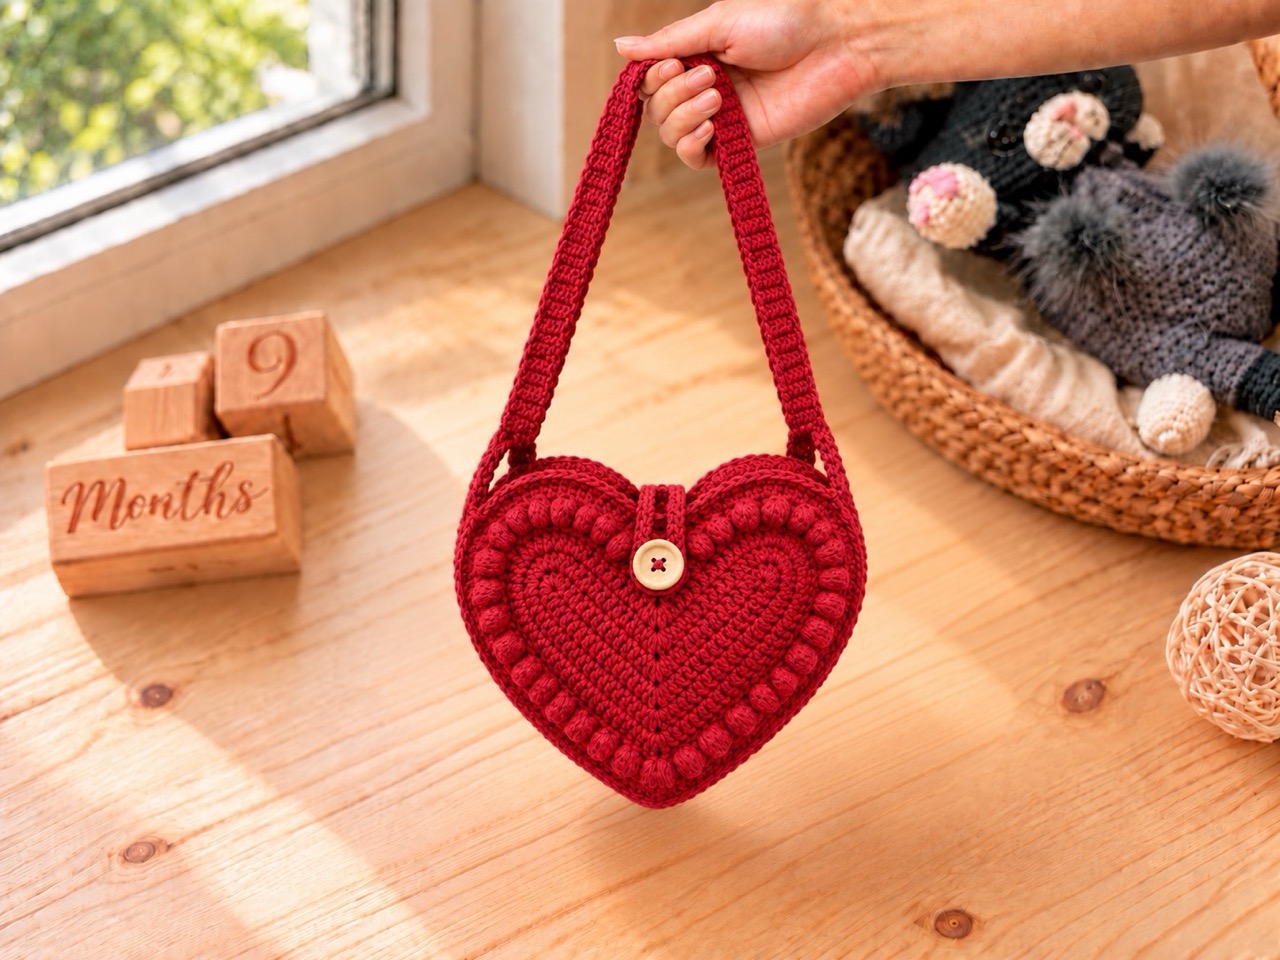
There’s something charming about a heart-shaped bag. Its rounded curves and pointed base turn a simple accessory into something playful and personal. This crochet heart bag pattern creates the Petal Heart Mini Bag, with six little bobbles across the front, a smooth back, a shallow gusset, and a comfortable flat shoulder strap.
The finished bag measures approximately 20–21 cm wide × 18–20 cm high, excluding the strap, with a depth of approximately 3 cm. It uses medium-weight cotton or cotton-blend yarn and a 4 mm hook.
The hearts are worked upward in turning rows, then finished with separately shaped lobes. A narrow gusset connects the panels, and a small buttonhole flap folds across the opening.
Below you’ll find the complete instructions, including materials, stitch explanations, both panels, the gusset, strap, closure, optional lining, and finishing tips.
Jump to a Section
- Why This Crochet Heart Bag Pattern Stands Out
- What You Need Before You Start
- Abbreviations and Special Stitches
- How to Crochet the First Heart Panel
- How to Crochet the Second Heart Panel
- How to Border the Heart Panels
- How to Crochet the Gusset
- How to Assemble the Heart Bag
- How to Make the Shoulder Strap
- How to Make the Buttonhole Flap
- How to Add an Optional Lining
- Putting Your Crochet Heart Bag Together
- Tips for a Neater Crochet Heart Bag
- FAQ About the Crochet Heart Bag Pattern
- Your Next Stitch
Why This Crochet Heart Bag Pattern Stands Out
The Petal Heart Mini Bag combines a recognizable heart silhouette with a few practical details.
- Finished size: Approximately 20–21 cm wide × 18–20 cm high, excluding the strap.
- Depth: Approximately 3 cm.
- Skill level: Confident beginner to intermediate.
- Yarn: Medium-weight cotton or a firm cotton blend.
- Hook: 4 mm, adjusted if necessary to obtain gauge.
- Construction: Two shaped heart panels connected by a narrow gusset.
- Texture: Six small bobbles decorate the front panel.
- Strap: A flat single-crochet strip with reinforced sewn attachments.
- Closure: A separate flap with a buttonhole.
- Optional lining: Useful for keeping small belongings from catching on the stitches.
What You Need Before You Start
Yarn and Tools
Gather the following supplies:
- Approximately 180–230 m / 200–250 yd of medium-weight cotton or a firm cotton-blend yarn, including the strap.
- 4 mm crochet hook, or the size needed to obtain gauge.
- One 12–15 mm button.
- Strong matching yarn for assembly.
- Tapestry needle.
- Scissors.
- Stitch markers.
- Optional lining fabric and sewing thread.
Choose a yarn that produces a firm fabric while remaining flexible. You can use one color throughout or choose a contrasting color for the strap and flap.
Gauge and Finished Size
Target gauge: 18 sc and 22 rows = 10 × 10 cm, measured over ordinary single crochet after the fabric has relaxed.
At this gauge, the finished bag should measure approximately:
- Width: 20–21 cm.
- Height: 18–20 cm, excluding the strap.
- Depth: Approximately 3 cm.
Check the first panel before making the second. Yarn thickness, tension, and edging can change the final dimensions.
General Pattern Notes
- This pattern uses US crochet terminology.
- Work in turning rows.
- Turning chains do not count as stitches.
- Work through both loops unless instructed otherwise.
- The front and back have the same outline, but only the front has bobbles.
- Use the same hook and tension for both panels.
- Count your stitches before turning.
- All decreases use two adjacent stitches.
- Keep the upper heart contours open when assembling the bag.
Abbreviations and Special Stitches
- ch — chain.
- sc — single crochet.
- sl st — slip stitch.
- inc — work 2 sc in the same stitch.
- dec — single crochet 2 stitches together.
- BLO — back loop only.
- st/sts — stitch/stitches.
- RS — right side, facing outward on the finished bag.
- WS — wrong side, facing inward on the finished bag.
- FO — fasten off.
- [N] — stitch count at the end of the row.
Single Crochet Decrease
- Insert the hook into the next stitch and pull up a loop.
- Insert the hook into the following stitch and pull up a loop.
- Yarn over and pull through all three loops.
Two stitches become one. Do not skip a stitch between them.
Three-Double-Crochet Bobble
Work three incomplete double crochets into the same stitch:
- Yarn over, insert the hook into the stitch, yarn over, and pull up a loop.
- Yarn over and pull through two loops.
- Repeat these two steps twice more into the same stitch.
- Four loops remain on the hook.
- Yarn over and pull through all four loops.
The bobble counts as one stitch.
Do not add a chain after it. Work the following stitch normally and push the bobble toward the RS.
How to Crochet the First Heart Panel
The first panel is the decorated front.
Lower Heart Section
Ch 3.
Row 1: Starting in the second chain from the hook, sc in each of the next 2 chains. [2]
Mark the side facing you as the RS.
Odd-numbered body rows are worked with the RS facing you. Even-numbered body rows are worked with the WS facing you.
For every following row, ch 1 and turn before working the instructions.
| Row | Instructions | Stitch count |
|---|---|---|
| 2 | Inc in both stitches. | 4 |
| 3 | 4 sc. | 4 |
| 4 | Inc, 2 sc, inc. | 6 |
| 5 | 6 sc. | 6 |
| 6 | Inc, 4 sc, inc. | 8 |
| 7 | 8 sc. | 8 |
| 8 | Inc, 6 sc, inc. | 10 |
| 9 | 10 sc. | 10 |
| 10 | Inc, 8 sc, inc. | 12 |
| 11 | 12 sc. | 12 |
| 12 | Inc, 10 sc, inc. | 14 |
| 13 | 14 sc. | 14 |
| 14 | Inc, 12 sc, inc. | 16 |
| 15 | 16 sc. | 16 |
| 16 | Inc, 14 sc, inc. | 18 |
| 17 | 18 sc. | 18 |
| 18 | Inc, 4 sc, bobble, 6 sc, bobble, 4 sc, inc. | 20 |
| 19 | 20 sc. | 20 |
| 20 | Inc, 18 sc, inc. | 22 |
| 21 | 22 sc. | 22 |
| 22 | Inc, 6 sc, bobble, 6 sc, bobble, 6 sc, inc. | 24 |
| 23 | 24 sc. | 24 |
| 24 | Inc, 22 sc, inc. | 26 |
| 25 | 26 sc. | 26 |
| 26 | Inc, 8 sc, bobble, 6 sc, bobble, 8 sc, inc. | 28 |
| 27 | 28 sc. | 28 |
| 28 | Inc, 26 sc, inc. | 30 |
| 29 | 30 sc. | 30 |
| 30 | Inc, 28 sc, inc. | 32 |
The three bobble rows are worked with the WS facing you. Push each bobble away from you so it appears on the outside of the bag.
Do not fasten off after Row 30.
First Rounded Lobe
Continue over the first 16 stitches only, leaving the remaining 16 body stitches unworked.
Start numbering the lobe rows separately.
- Lobe Row 1: Ch 1, turn, 16 sc. [16]
- Lobe Row 2: Ch 1, turn, dec, 13 sc, inc. [16]
- Lobe Row 3: Ch 1, turn, inc, 13 sc, dec. [16]
- Lobe Row 4: Ch 1, turn, 16 sc. [16]
- Lobe Row 5: Ch 1, turn, dec, 12 sc, dec. [14]
- Lobe Row 6: Ch 1, turn, dec, 10 sc, dec. [12]
- Lobe Row 7: Ch 1, turn, dec, 8 sc, dec. [10]
- Lobe Row 8: Ch 1, turn, dec, 6 sc, dec. [8]
- Lobe Row 9: Ch 1, turn, dec × 4. [4]
- Lobe Row 10: Ch 1, turn, dec × 2. [2]
FO.
Second Rounded Lobe
With the RS facing you, locate the 16 unworked stitches of Body Row 30.
Join yarn in the first unworked stitch beside the central cleft. Work toward the outside edge.
- Lobe Row 1: Ch 1, 16 sc. [16]
- Lobe Row 2: Ch 1, turn, inc, 13 sc, dec. [16]
- Lobe Row 3: Ch 1, turn, dec, 13 sc, inc. [16]
- Lobe Row 4: Ch 1, turn, 16 sc. [16]
- Lobe Row 5: Ch 1, turn, dec, 12 sc, dec. [14]
- Lobe Row 6: Ch 1, turn, dec, 10 sc, dec. [12]
- Lobe Row 7: Ch 1, turn, dec, 8 sc, dec. [10]
- Lobe Row 8: Ch 1, turn, dec, 6 sc, dec. [8]
- Lobe Row 9: Ch 1, turn, dec × 4. [4]
- Lobe Row 10: Ch 1, turn, dec × 2. [2]
FO.
The two lobes should mirror one another, with a small cleft between them.
How to Crochet the Second Heart Panel
Make the back panel using the same lower-heart and lobe instructions.
Replace the three decorated rows with plain single crochet:
- Body Row 18: Inc, 16 sc, inc. [20]
- Body Row 22: Inc, 20 sc, inc. [24]
- Body Row 26: Inc, 24 sc, inc. [28]
Work every other row exactly as for the front.
Complete both lobes and fasten off.
Lay the panels together and compare their outlines before adding the borders.
How to Border the Heart Panels
Border each panel separately with the RS facing you.
Join yarn at the central cleft between the lobes. Ch 1.
- Work approximately 1 sc into each row end up the inner edge of the first lobe.
- Work 1 sc in each of its 2 top stitches.
- Continue down the outer lobe edge and the side of the lower heart, working approximately 1 sc per row end.
- At the bottom, work 1 sc into the underside of each of the two worked foundation chains, with ch 1 between them.
- Continue up the other side and around the second lobe in the same way.
- Work a sl st into the central cleft, then join to the first border sc.
FO.
Mark the bottom ch-1 space.
The border should lie flat. Add an occasional stitch if an edge pulls inward, or omit an occasional stitch if it ripples.
Use the same stitch distribution on both panels so corresponding edges have matching counts.
Mark the Opening
On each panel, place a marker in the outer border beside the end of Lobe Row 4, one on each side.
These are the shoulder markers.
The lower section between the markers—down one side, around the bottom point, and up the other side—will connect to the gusset.
The upper section over the lobes and through the cleft remains open.
How to Crochet the Gusset
The gusset is worked directly onto the front panel’s lower border.
Gusset Row 1
With the front panel’s RS facing you, join yarn at the shoulder marker from which you can work along the lower edge.
Ch 1.
Working in BLO, crochet:
- 1 sc in each border stitch down the side.
- 1 sc in the bottom ch-1 space.
- 1 sc in each border stitch up the other side.
Include both marked shoulder stitches.
Leave the upper heart contour unworked.
Count the stitches in this row and record the number as N.
Mark the stitch worked into the bottom ch-1 space.
Gusset Rows 2–6
Ch 1, turn, sc in every stitch across. [N per row]
Move the bottom marker into the corresponding stitch of each new row.
Do not increase at the bottom point. Keeping the count constant creates the bag’s depth.
After Row 6, FO with a long sewing tail.
At the stated gauge, the gusset should measure approximately 2.7 cm deep.
How to Assemble the Heart Bag
Place the back panel behind the front panel, with both right sides facing outward.
Bring the back panel’s lower border against the free edge of Gusset Row 6.
Match:
- Both shoulder markers.
- The bottom point.
- The corresponding side sections.
The back panel’s lower edge should contain N joining positions, counting its bottom ch-1 space as one position. Adjust the back border before sewing if necessary.
Whipstitch one gusset stitch to each corresponding back-panel border stitch.
At the bottom point, sew the marked gusset stitch into the back panel’s ch-1 space.
Keep the seam firm without pulling it tight enough to pucker.
Secure the yarn and hide the tail inside the seam.
The upper heart contours remain open.
How to Make the Shoulder Strap
The strap is worked as a flat strip.
Ch 6.
- Row 1: Starting in the second chain from the hook, 5 sc. [5]
- Row 2: Ch 1, turn, 5 sc. [5]
Repeat Row 2 until the strap measures approximately 90–105 cm, without stretching.
Allow 2.5 cm at each end for attachment. The exposed strap will therefore measure approximately 85–100 cm.
Check the length against the wearer before fastening off.
FO with a long sewing tail.
Attach the Strap
Position one end inside each upper end of the gusset.
Overlap approximately 2.5 cm of strap onto the inside of the bag below the opening.
Sew around the overlapping area, then add a diagonal line of stitches across it. Catch several rows of both the strap and gusset.
Make sure the strap lies flat before sewing its second end.
How to Make the Buttonhole Flap
Use the main color or a contrasting color.
Leave a starting tail for attachment, then ch 7.
- Row 1: Starting in the second chain from the hook, 6 sc. [6]
- Rows 2–8: Ch 1, turn, 6 sc. [6 per row]
- Row 9: Ch 1, turn, 2 sc, ch 2, skip 2 stitches, 2 sc. [4 sc and 2 ch]
- Row 10: Ch 1, turn, 2 sc, 2 sc into the ch-2 space, 2 sc. [6]
- Row 11: Ch 1, turn, dec, 2 sc, dec. [4]
- Row 12: Ch 1, turn, dec × 2. [2]
FO and weave in the finishing tail.
Test the button through the hole. It should pass through with gentle pressure.
Attach the Flap
Center the flap’s foundation edge on the outside of the back panel, approximately 1 cm below the central cleft.
The flap should point upward.
Sew its foundation edge securely across the back panel, leaving the remaining rows free to fold over the opening.
Fold the flap forward across the gusset and onto the front panel.
Mark the button position through the buttonhole, then sew the button in place. Leave enough room beneath it for the flap fabric.
Check the closure with a small item inside the bag before securing the sewing ends.
How to Add an Optional Lining
A fabric lining helps prevent small belongings from catching on the crochet stitches.
- Trace a finished heart panel onto paper.
- Draw the lining’s seam line slightly inside that outline so it fits within the crocheted bag.
- Add approximately 1 cm seam allowance outside the seam line.
- Cut two fabric hearts.
- Cut a fabric gusset strip to match the bag’s lower joining edge and depth, adding seam allowances.
- Sew the strip between the two fabric hearts along the sides and bottom.
- Leave the upper heart contours open.
- Turn the upper raw edges inward.
- Test the lining inside the bag.
- Hand-sew its upper edge just below the crocheted opening.
The lining should sit comfortably inside without pulling on the crochet.
Putting Your Crochet Heart Bag Together
- Make the front panel. Include the six bobbles and both rounded lobes.
- Make the back panel. Follow the same shaping with plain stitches.
- Border both panels. Match their lower-edge stitch counts.
- Mark the shoulders and point. These guide the gusset and assembly.
- Crochet the gusset. Work six rows along the front panel’s lower border.
- Attach the back. Sew it to the free gusset edge.
- Make and attach the strap. Reinforce both overlapping ends.
- Add the flap and button. Position the button after checking the flap’s reach.
- Add the optional lining.
- Finish and shape. Secure all ends and smooth the heart outline.
If blocking is needed, follow the yarn’s care instructions. Shape the bag gently while damp and allow it to dry completely before use.
Tips for a Neater Crochet Heart Bag
- Check the gauge first. It determines the panel size and fabric density.
- Count every increase row. Each even-numbered body row adds two stitches.
- Mark the RS. This keeps the bobbles facing outward.
- Keep bobbles compact. Each one replaces a single ordinary stitch.
- Compare the panels early. Correct size differences before assembly.
- Match the borders. Corresponding lower edges need equal joining counts.
- Keep the gusset count constant. Extra increases would change its shape.
- Avoid tight seams. The heart outline should remain smooth.
- Fit the strap before sewing. Yarn straps may lengthen with use.
- Position the button last. Its location depends on the completed bag.
- Use a lining for small belongings. It also helps support the interior.
FAQ About the Crochet Heart Bag Pattern
What skill level is this crochet heart bag pattern?
It suits a confident beginner to intermediate crocheter. You should know chains, single crochet, increases, decreases, turning rows, and basic sewing. The bobble stitch is explained above.
How big is the finished bag?
Approximately 20–21 cm wide × 18–20 cm high, excluding the strap, with a depth of approximately 3 cm.
Measurements depend on your yarn, gauge, edging, and finishing.
What yarn does this crochet heart bag pattern use?
Use approximately 180–230 m / 200–250 yd of medium-weight cotton or a firm cotton blend, including the strap.
What hook size do I need?
Start with a 4 mm hook and adjust it to obtain approximately 18 sc and 22 rows per 10 cm.
Are the heart panels worked in rounds?
No. Both panels begin at the bottom point and grow upward in turning rows. Each upper lobe is then shaped separately.
Are the two panels identical?
Their outlines match. The front has six bobbles, while the back uses plain single crochet.
You can omit the bobbles and make both panels smooth.
How many double crochets are in each bobble?
Each bobble uses three incomplete double crochets worked into one stitch and closed together. It counts as one stitch.
Does the decrease skip a middle stitch?
No. Every decrease uses two adjacent stitches and turns them into one.
What gives the bag its depth?
A six-row gusset connects the lower edges of the two panels. At the stated gauge, it adds approximately 2.7 cm of depth.
How long is the strap?
Crochet a strip approximately 90–105 cm long. After overlapping 2.5 cm at each end for attachment, the exposed length is approximately 85–100 cm.
Adjust the length to suit the wearer.
How does the bag close?
A crocheted flap folds from the back over the opening and buttons onto the front. The buttonhole is formed in Flap Row 9.
Can I make the bag in another size?
Yes. A different yarn thickness and hook will change its size. Make a gauge swatch and measure the first panel before continuing.
Check the gusset depth, strap length, and flap fit separately when changing the scale.
Does the bag need a lining?
A lining is optional. It is useful for carrying small items and can help support the crocheted fabric.
Your Next Stitch
This crochet heart bag pattern creates a compact accessory with rounded lobes, a pointed base, and a little bobble texture. Keep it simple in one color, or give the strap and flap a contrasting finish.
Gather your cotton yarn, pick up your 4 mm hook, and begin with the small foundation chain. Work through the shaping a row at a time, compare your panels before joining, and fit the strap and closure before sewing them permanently.
Happy crocheting!
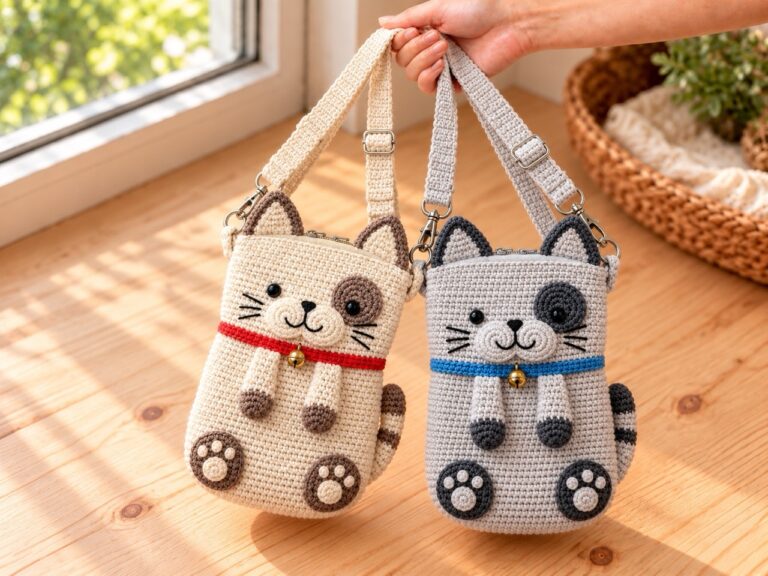
Want a smaller bag for everyday essentials? Try the crochet cat phone bag pattern for a zippered crossbody pouch with ears, paws, and an adjustable strap.